Frame after primer coat
1. Primer
Frame after first aubergine coat
2. Aubergine
Frame with all chrome decals down, no clear coat yet
3. Chrome decals
Frame after clear coat, decals locked in
4. Clear coat

In a previous post I covered why I converted my 2013 Scott Scale 920 from an XC hardtail into a drop-bar gravel bike. This is the companion: the respray itself, told mostly in pictures.

The plan: strip the factory black to bare carbon, prep the frame mods, lay down primer, then three colours in zones (metallic aubergine as the base, cherry red on the upper body, Montana Black at the bottom bracket and chain-stays), finished with a chrome stencil decal layer and a single coat of 2K Spraymax clear over the lot. Sanded with 1000–1500 grit between every step.
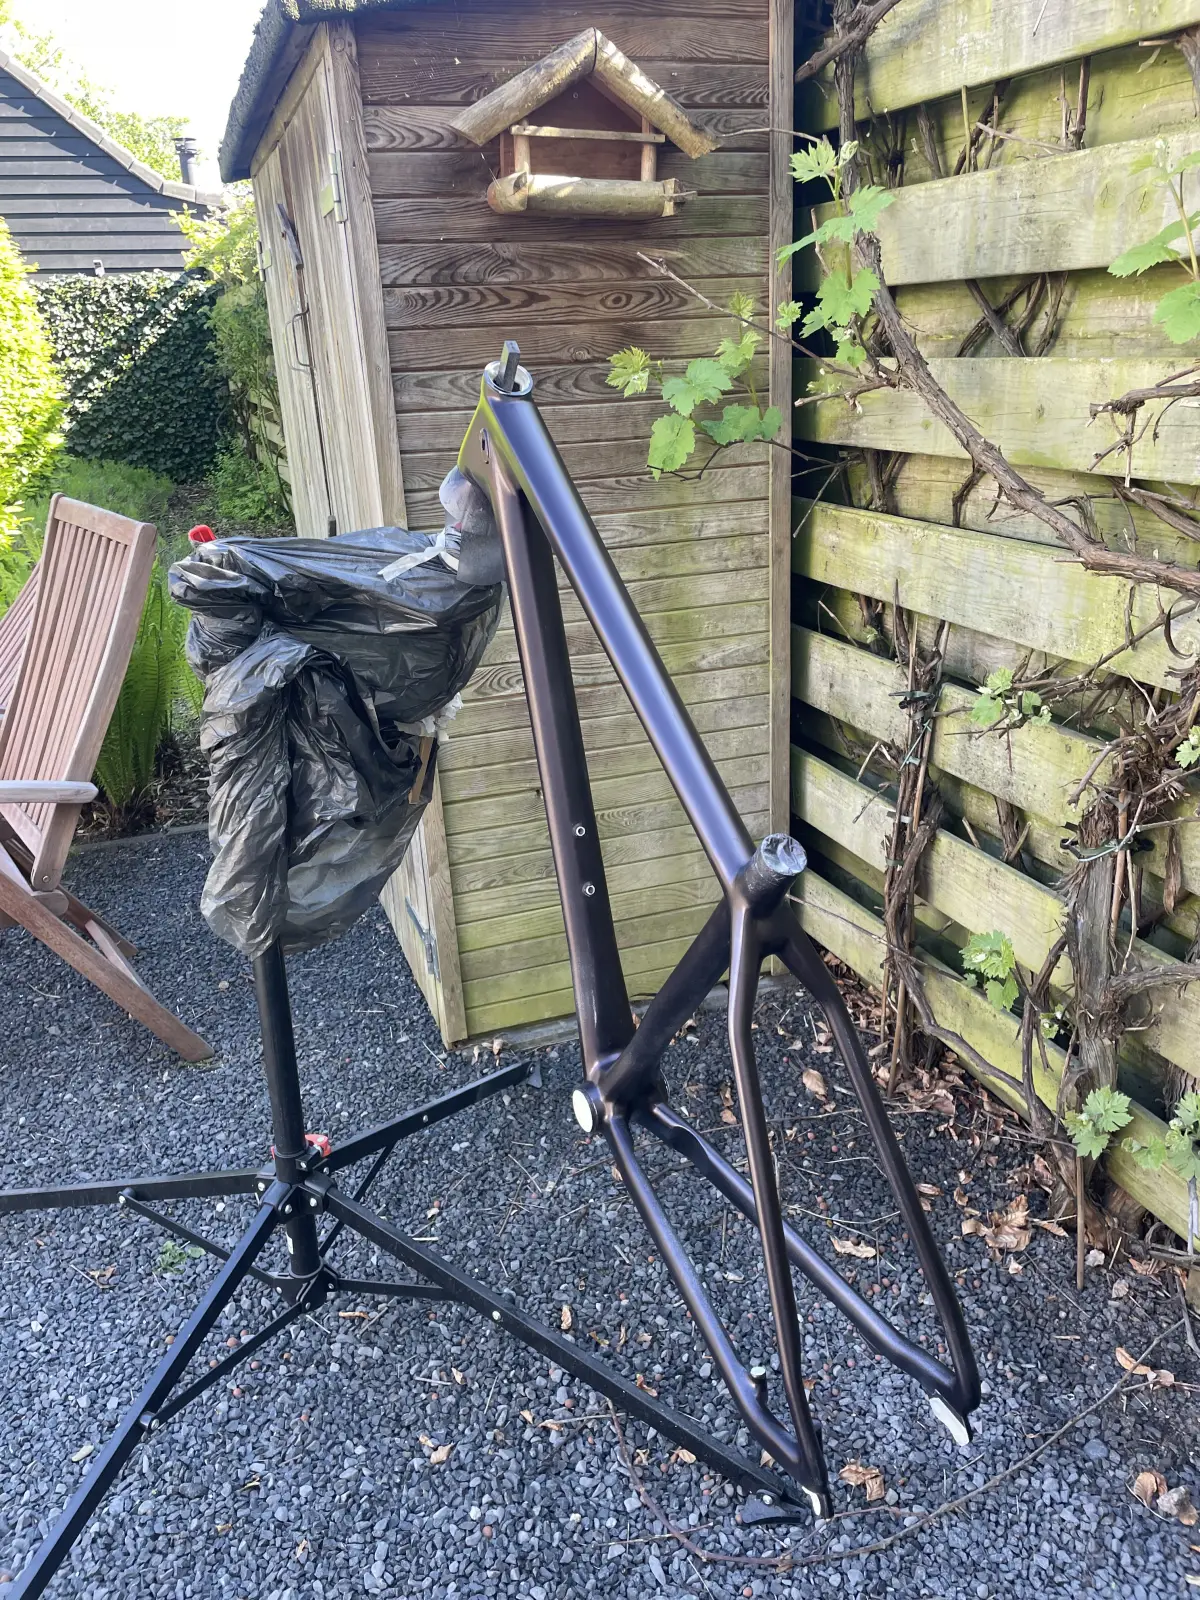
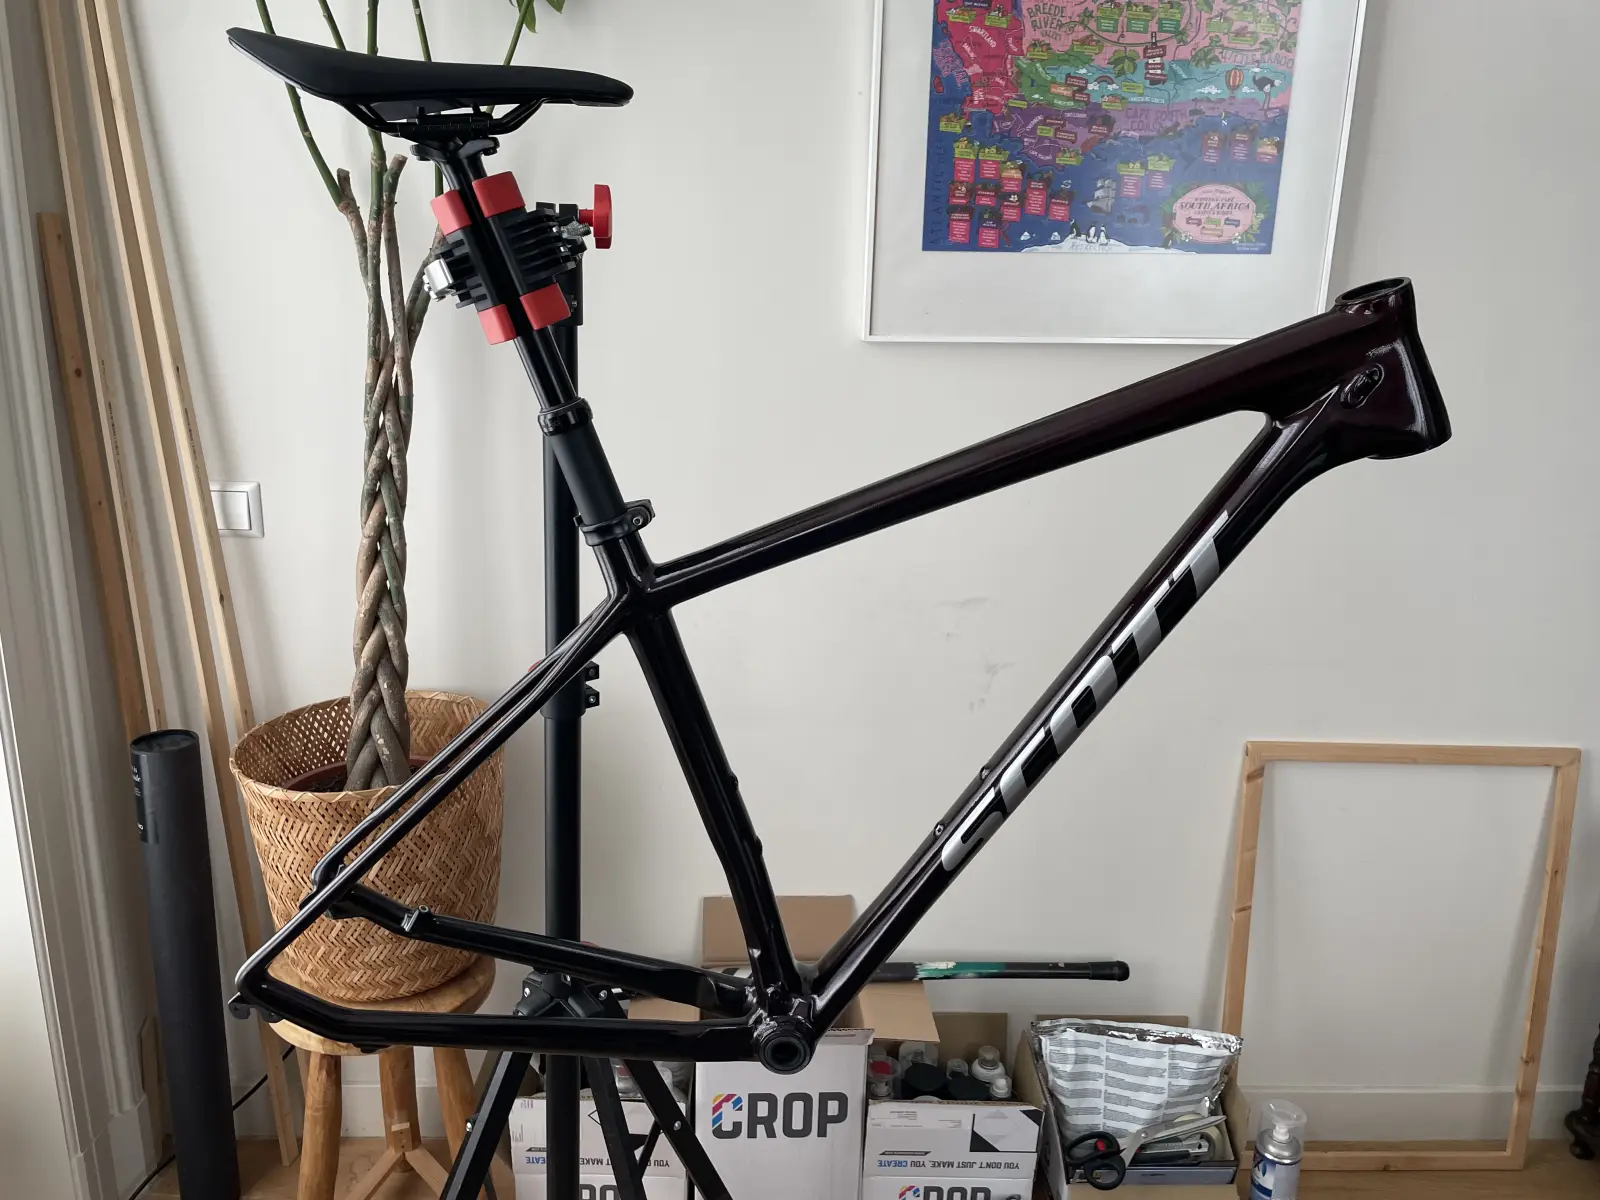
Frame surgery first

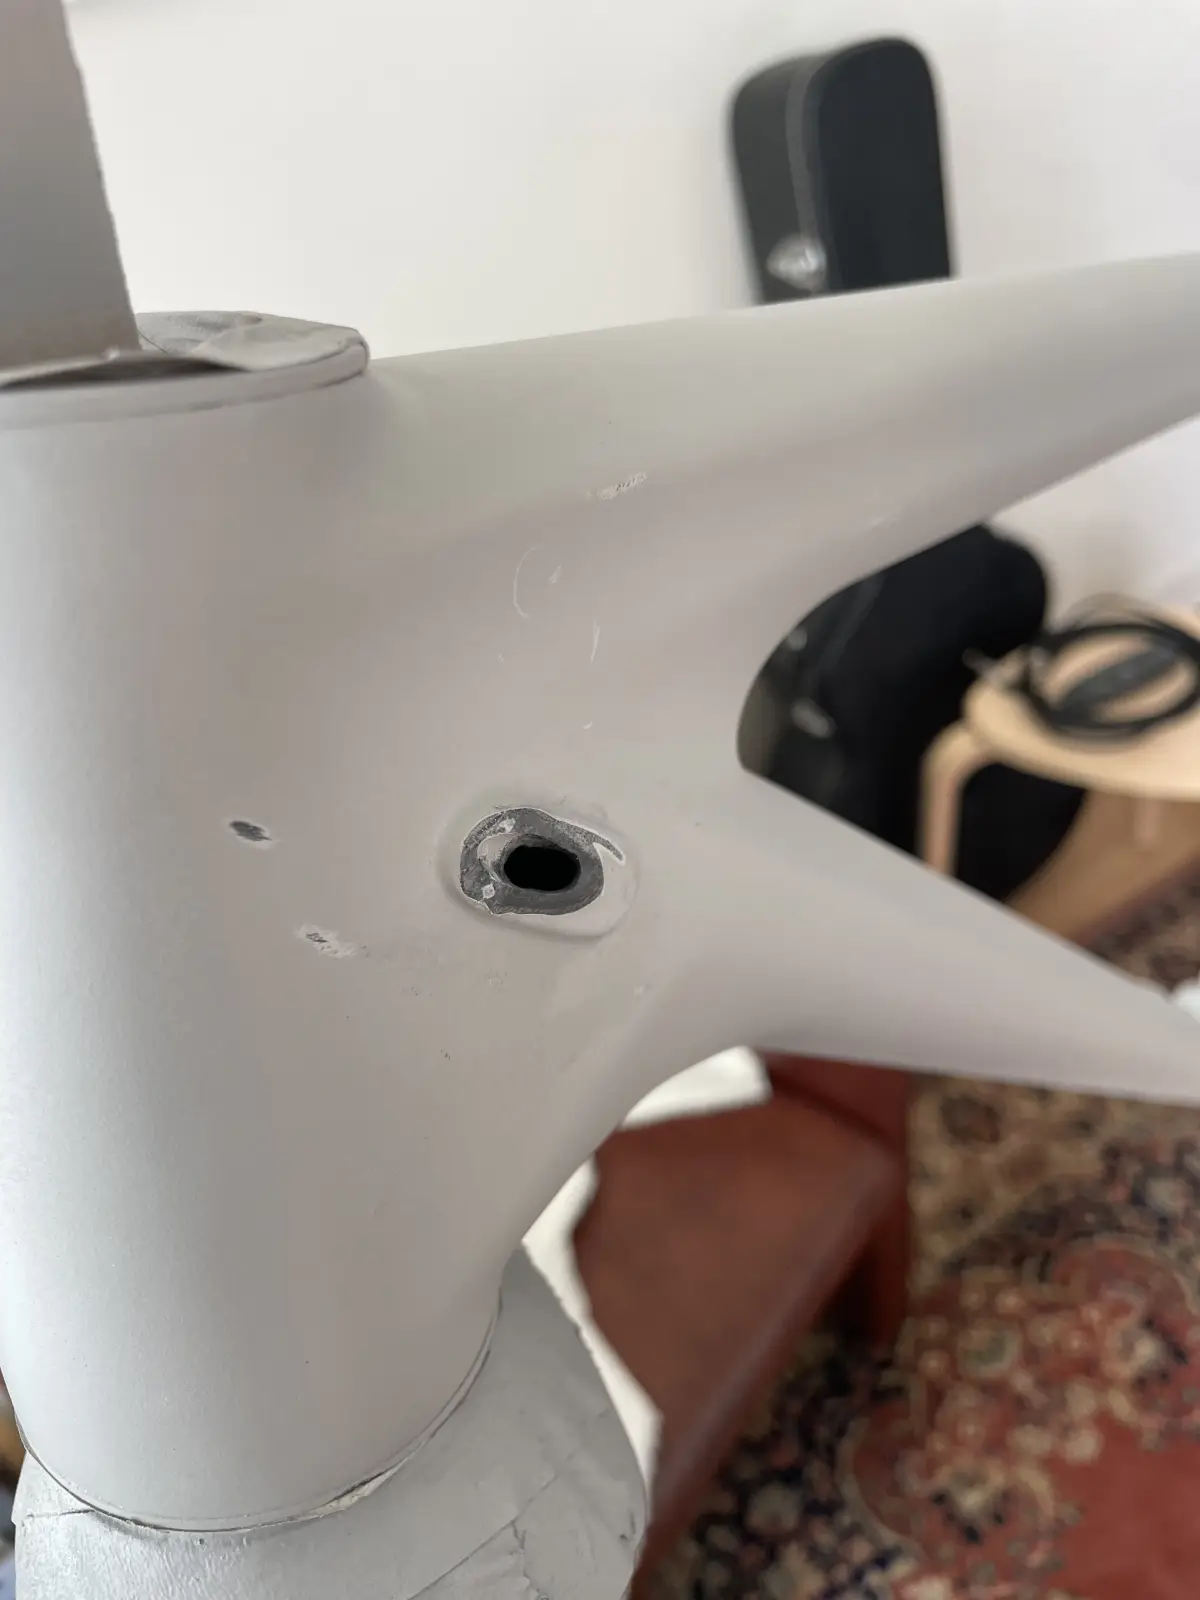
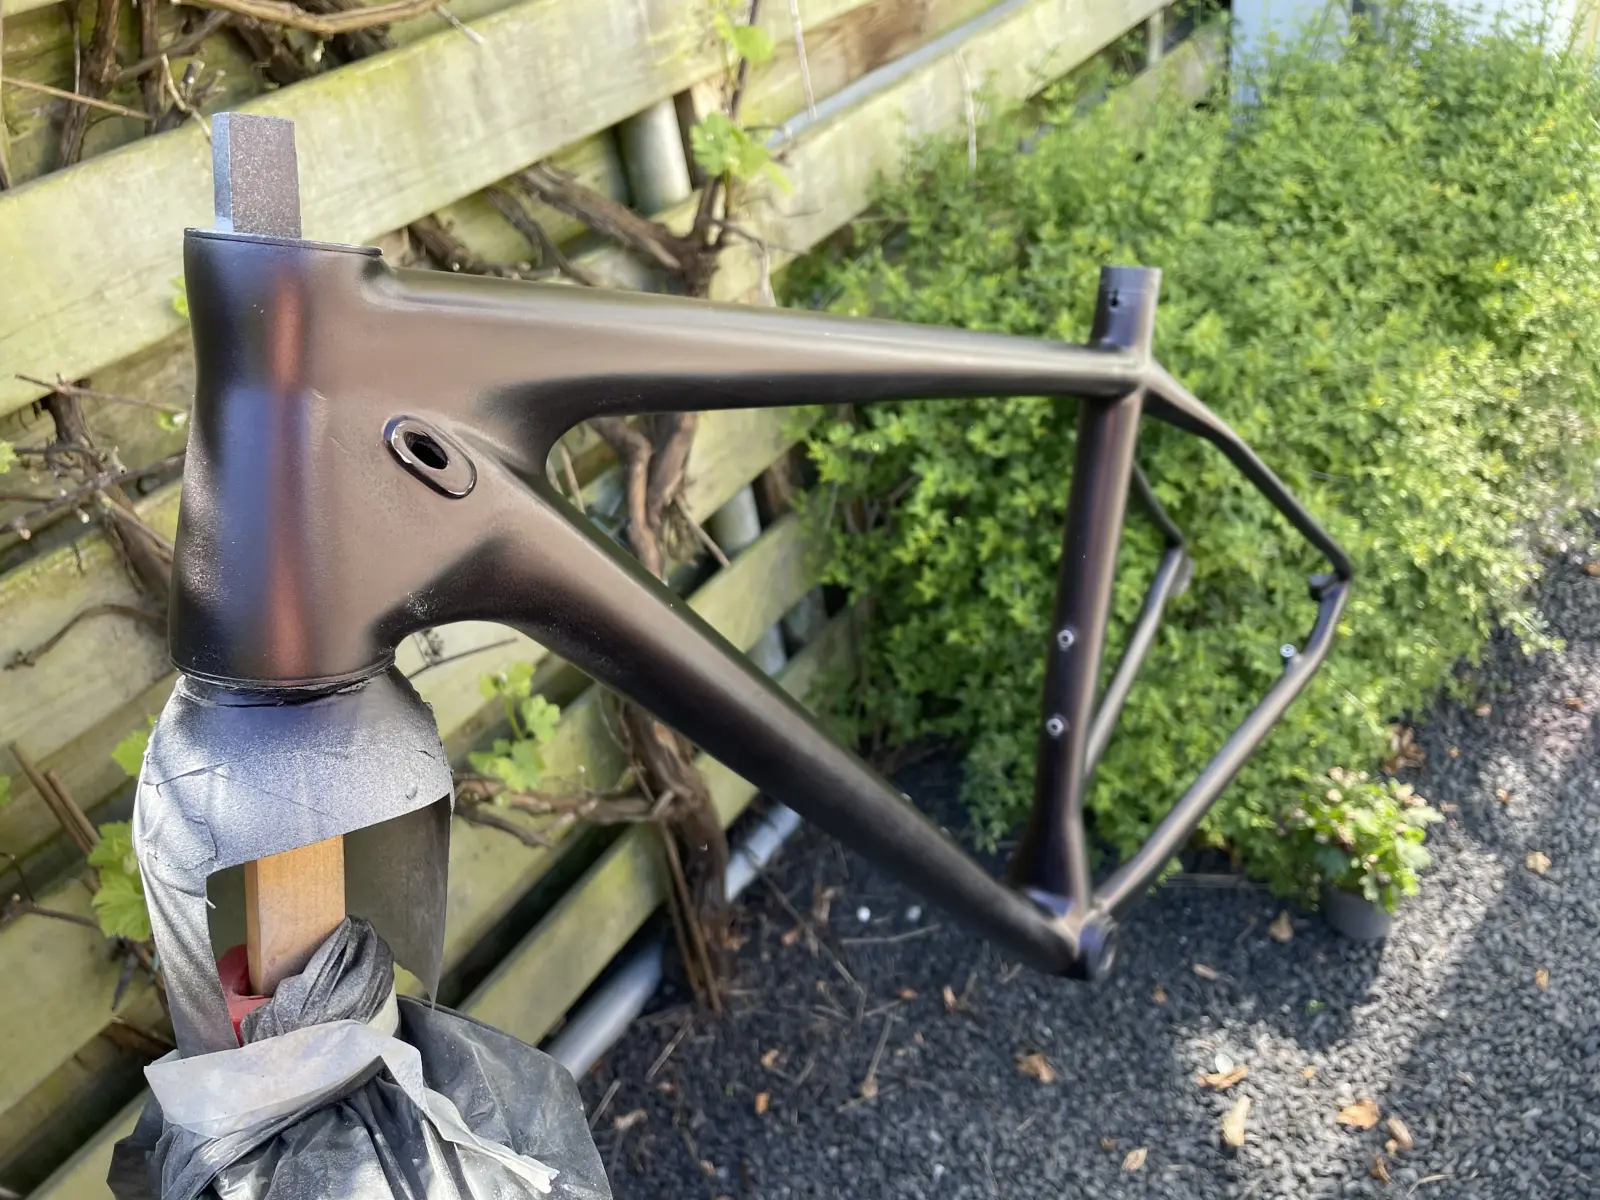
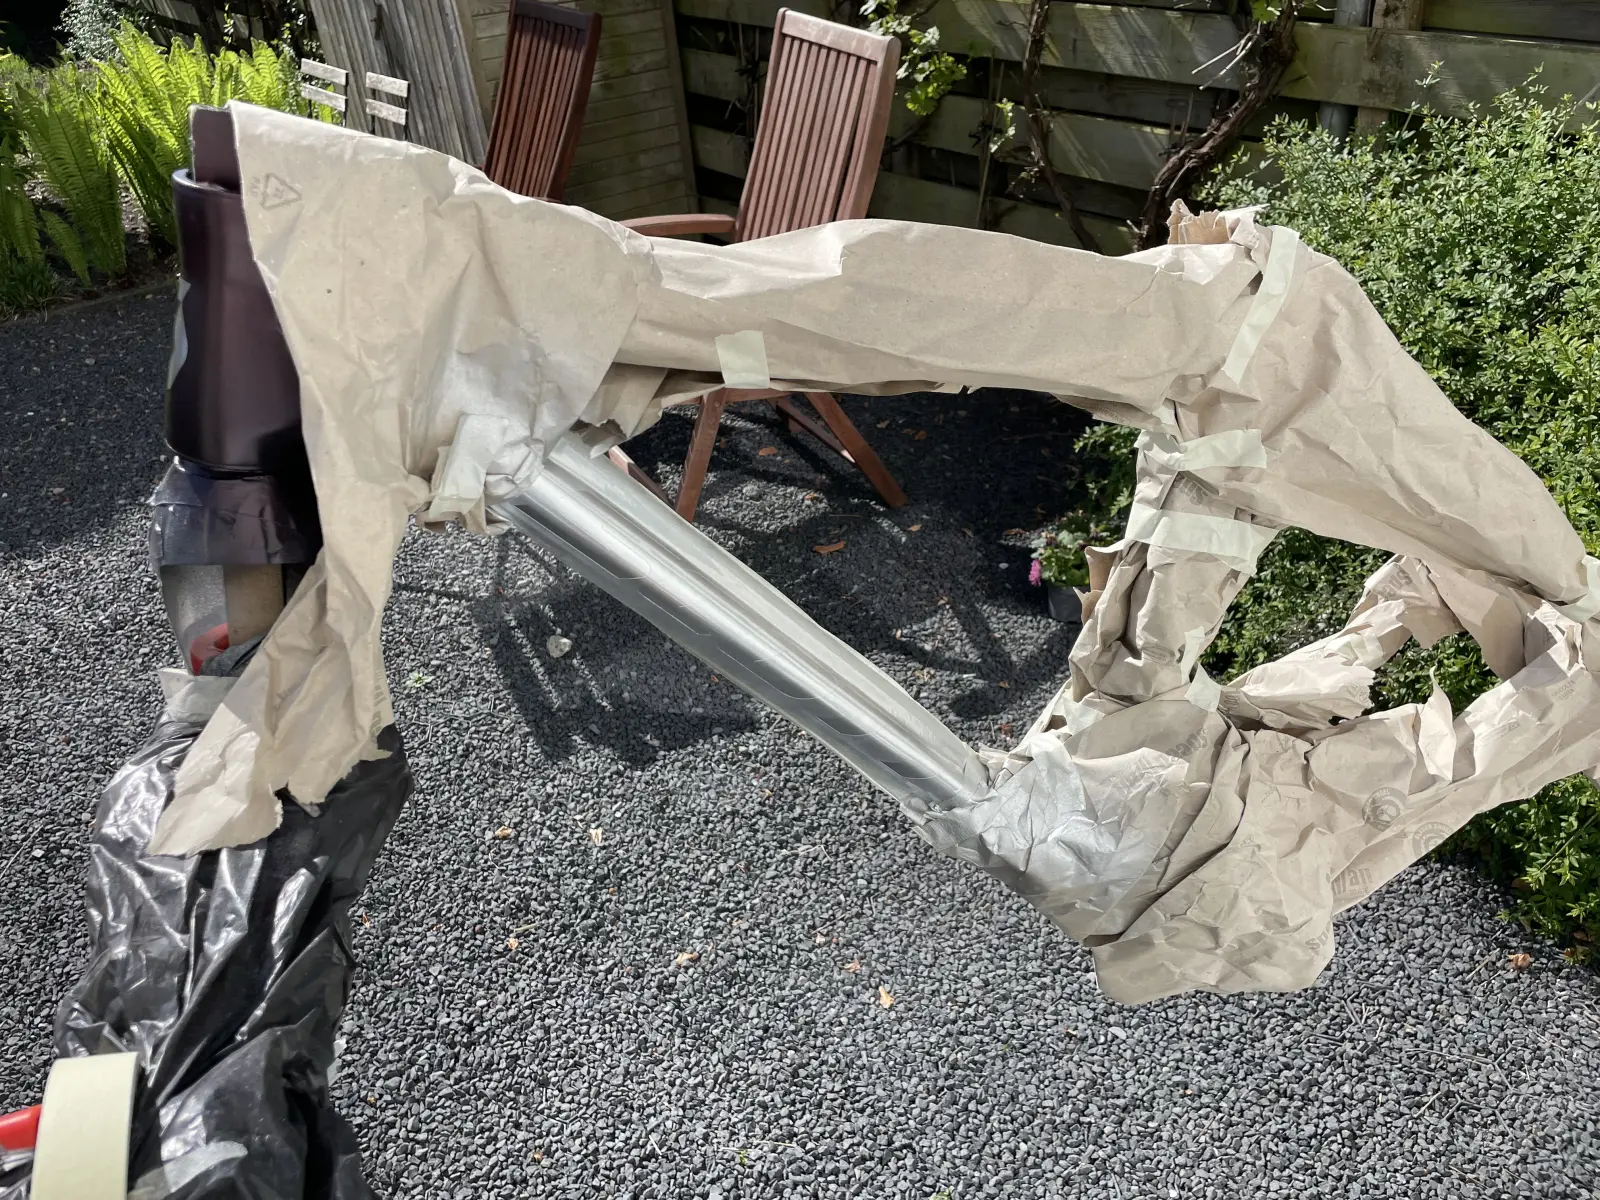
Before any paint, the frame needed cleaning up. The original brake hose ran externally along the down-tube, with mounting grooves moulded into the carbon. Those got cut off and sanded flush. The original front-derailleur cable port was enlarged so it could carry the rear brake hose and the rear derailleur cable; the old rear-derailleur exit was drilled through to take the dropper-post housing.

Drilling out a cable routing port on the down-tube
Reboring a routing port
Drill in hand, mid-cut on the frame
Drill, in carbon, careful work

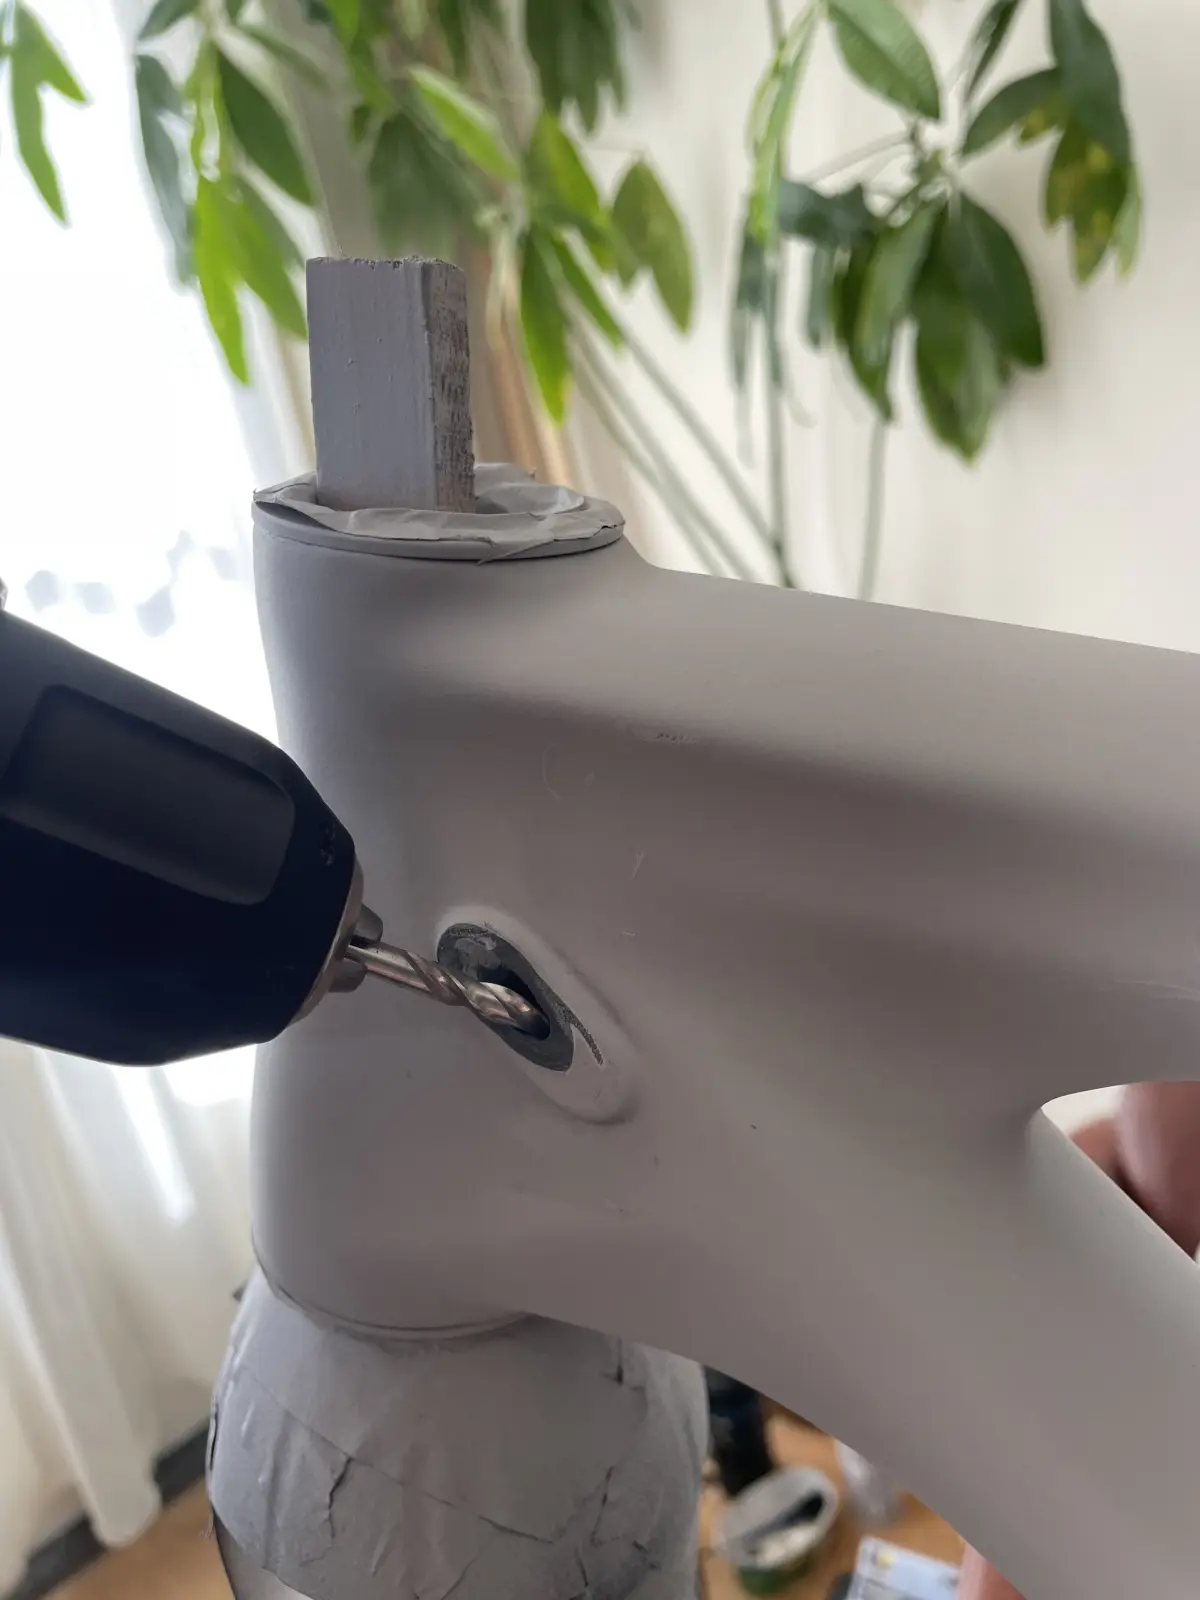
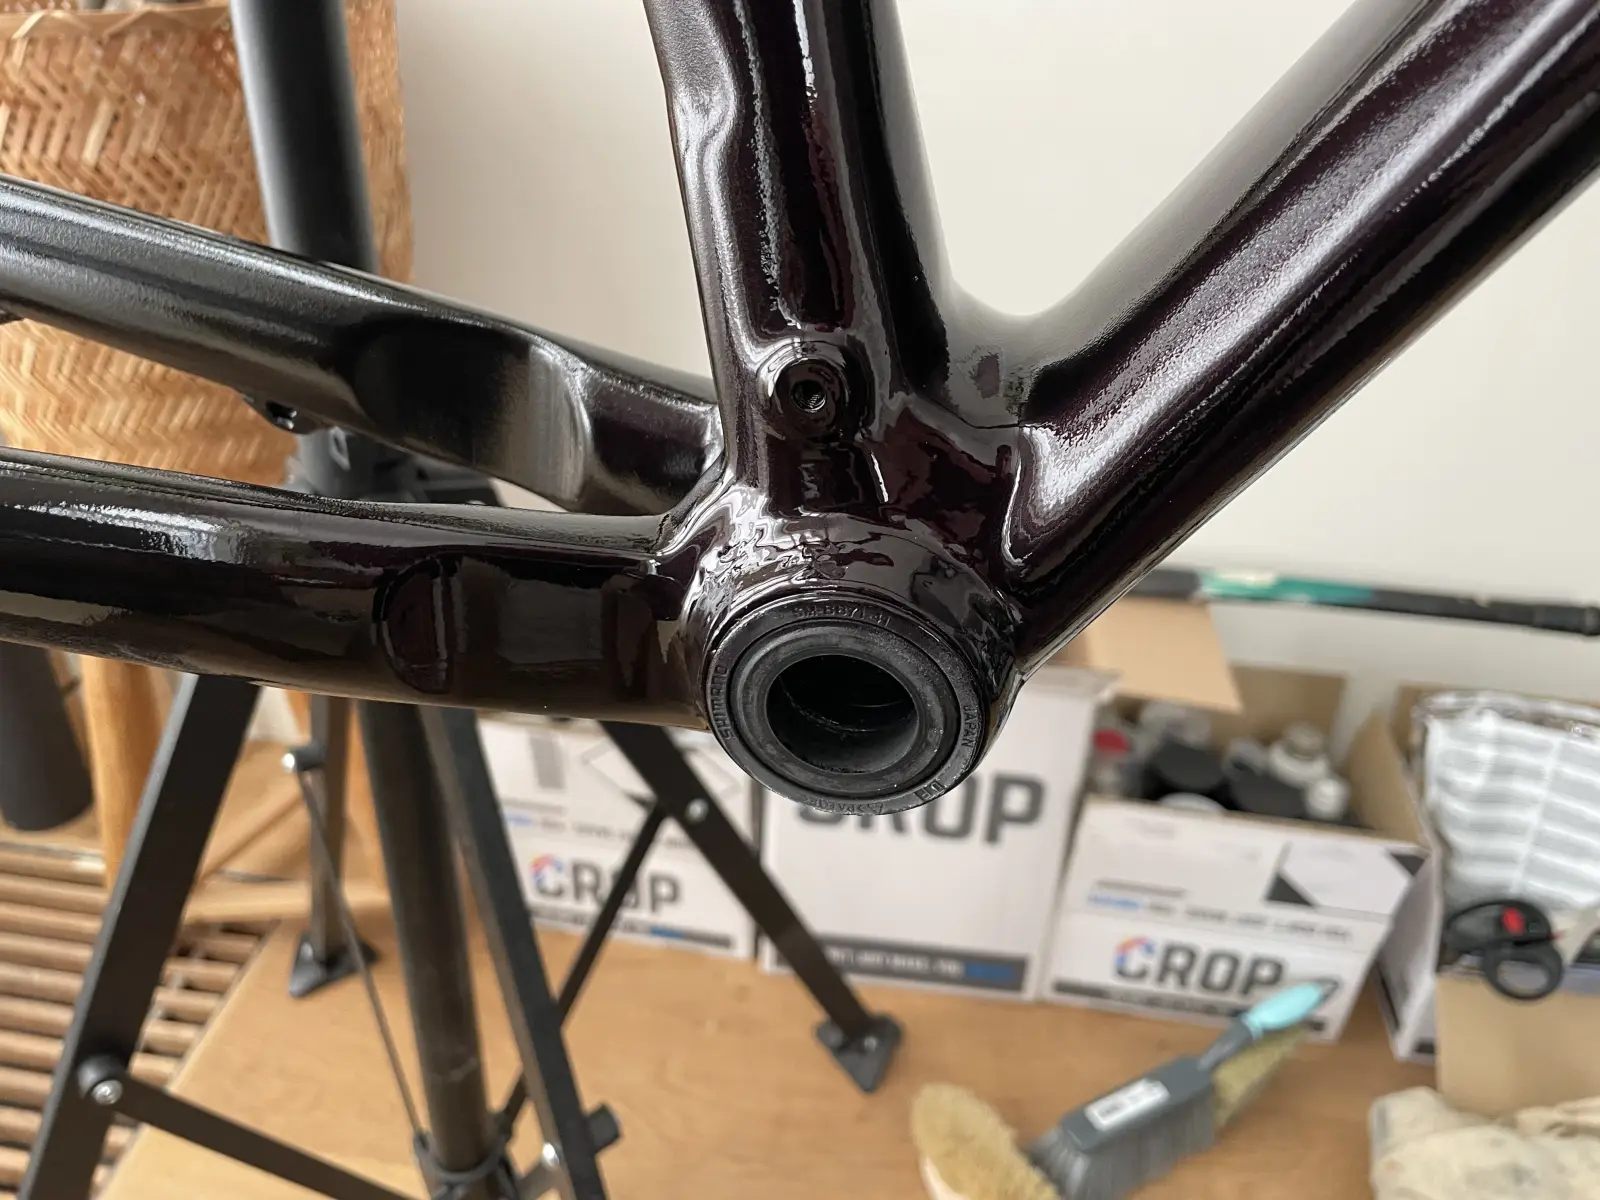
Net effect: zero external cable mounts on the down-tube. Everything exits at the bottom bracket.
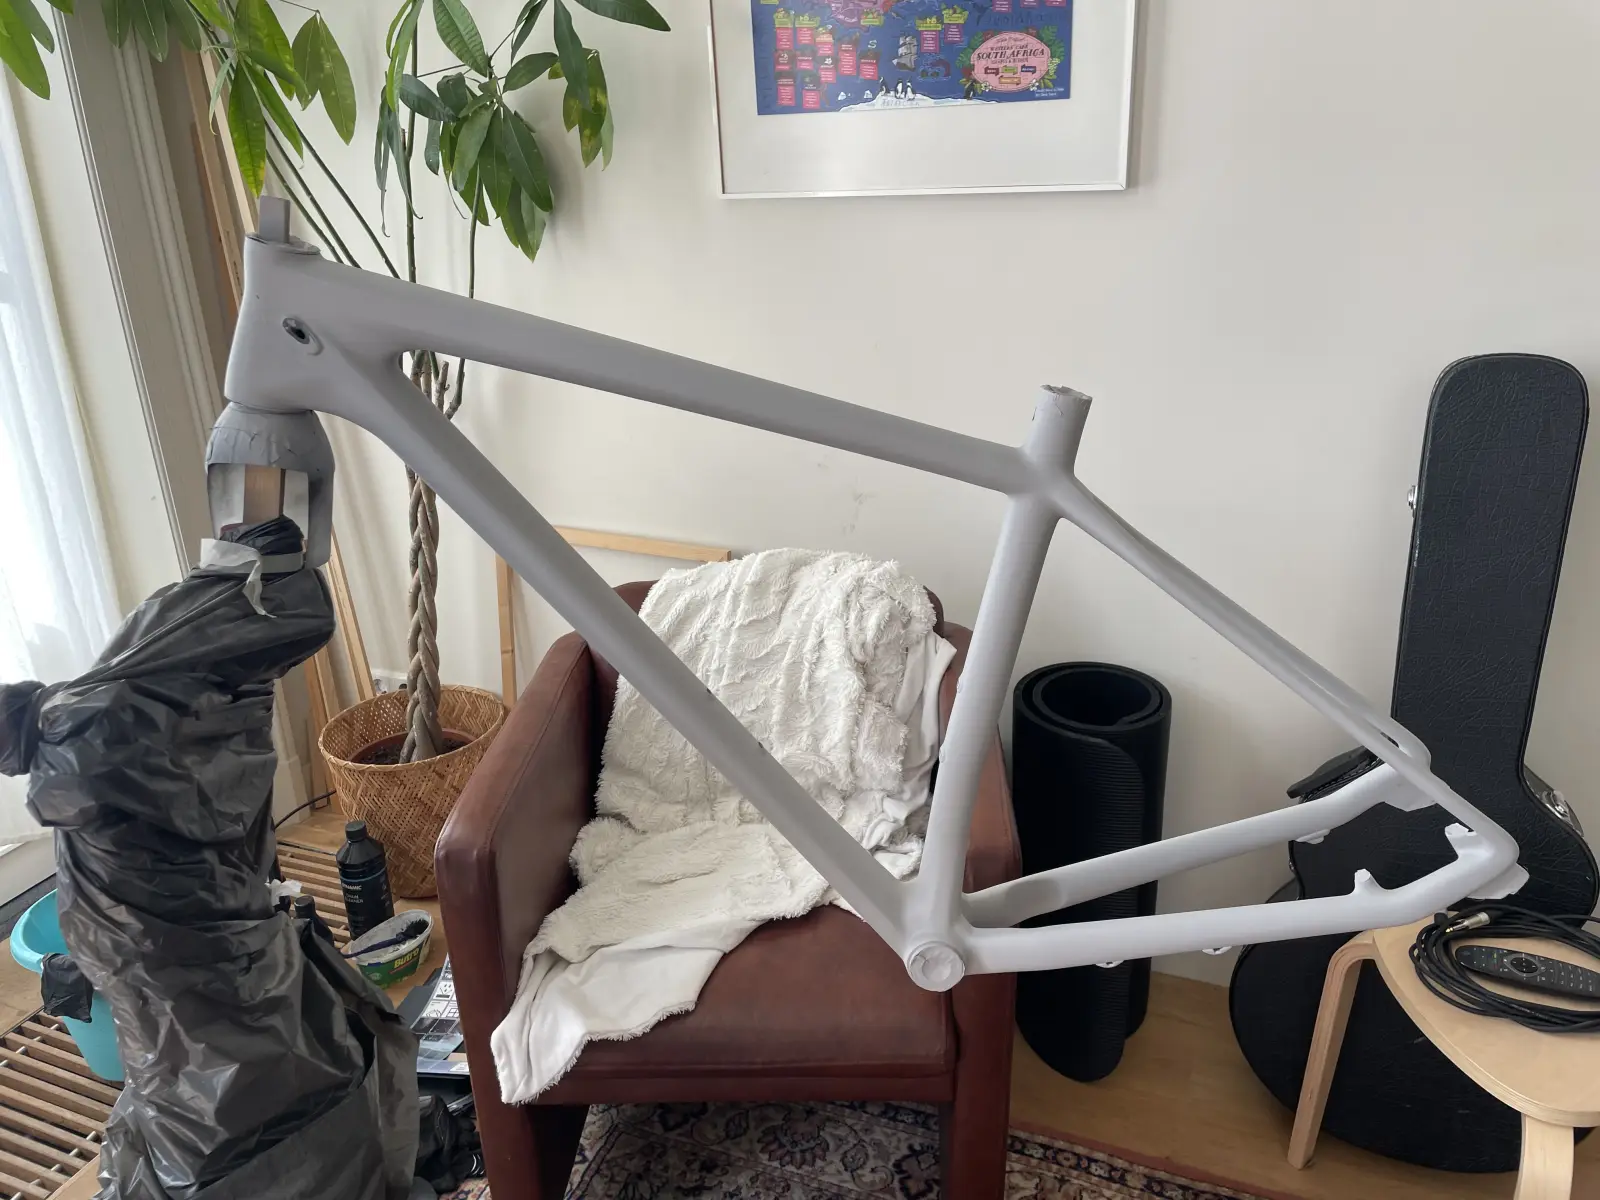
Primer

Frame after primer coat, hanging on a workshop stand
Primed with a white 1K epoxy primer

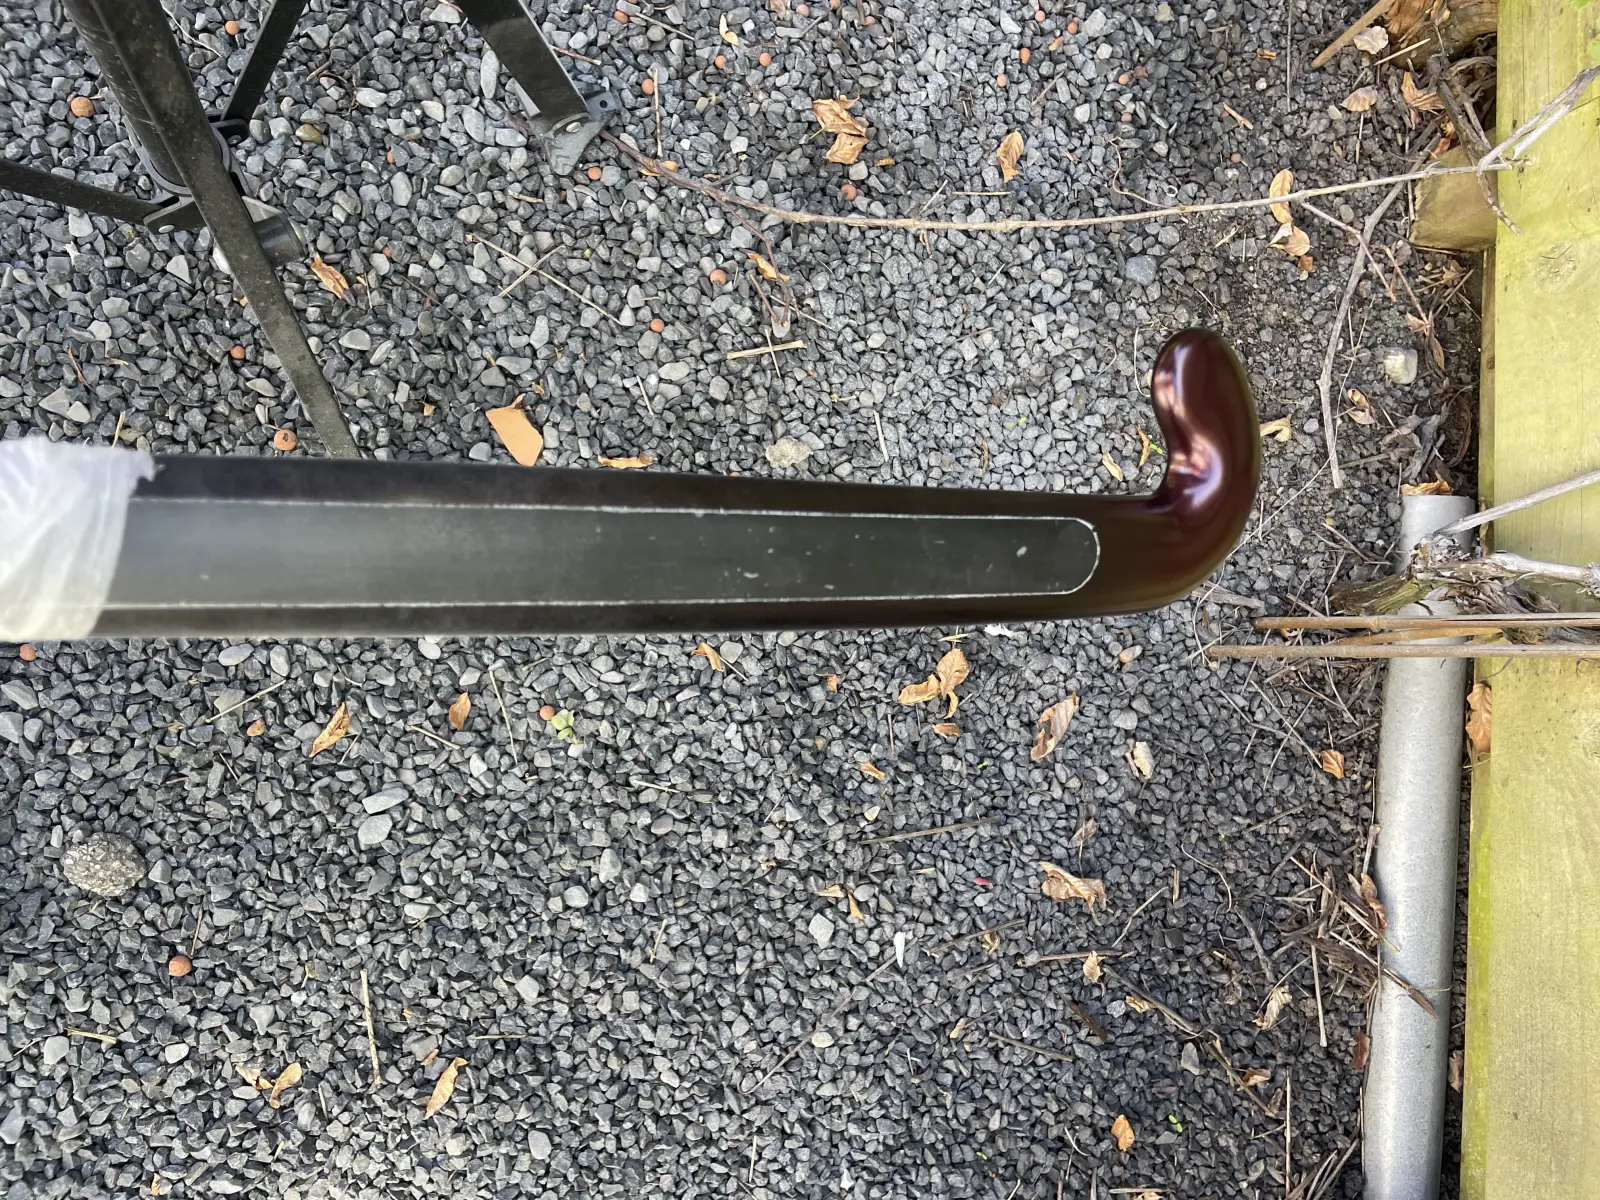
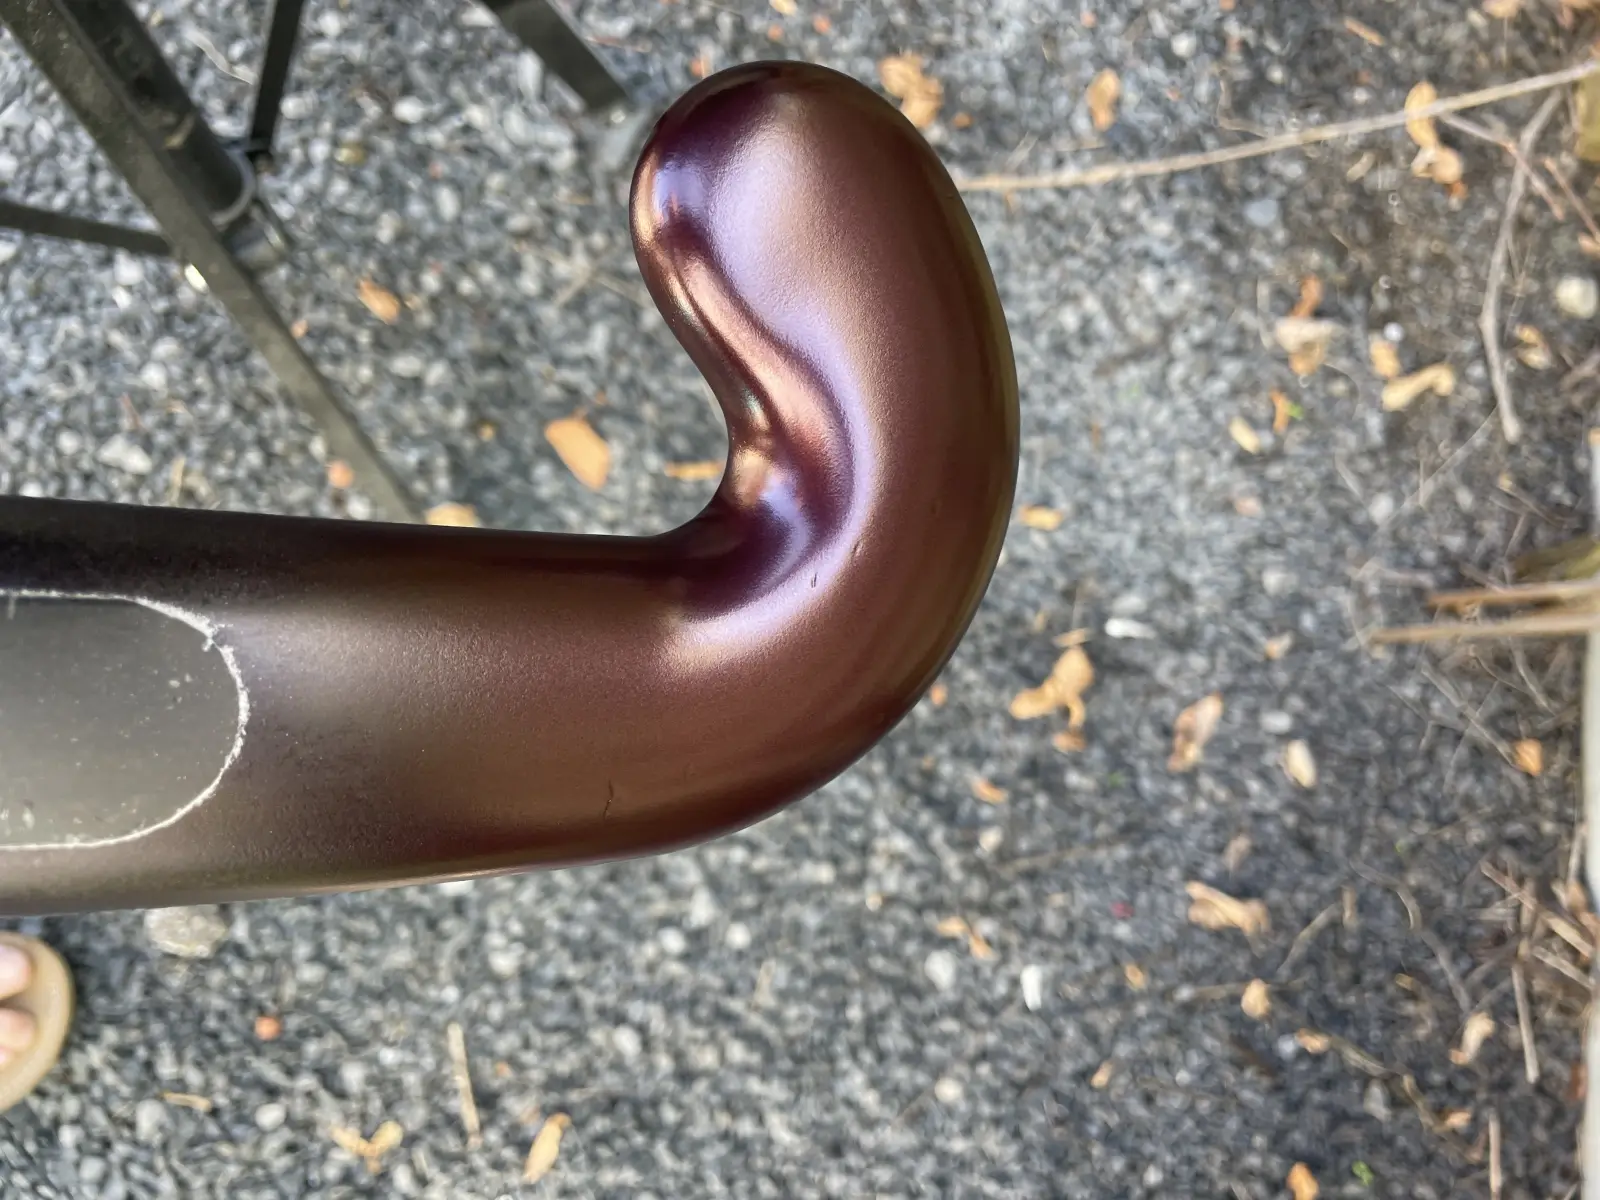
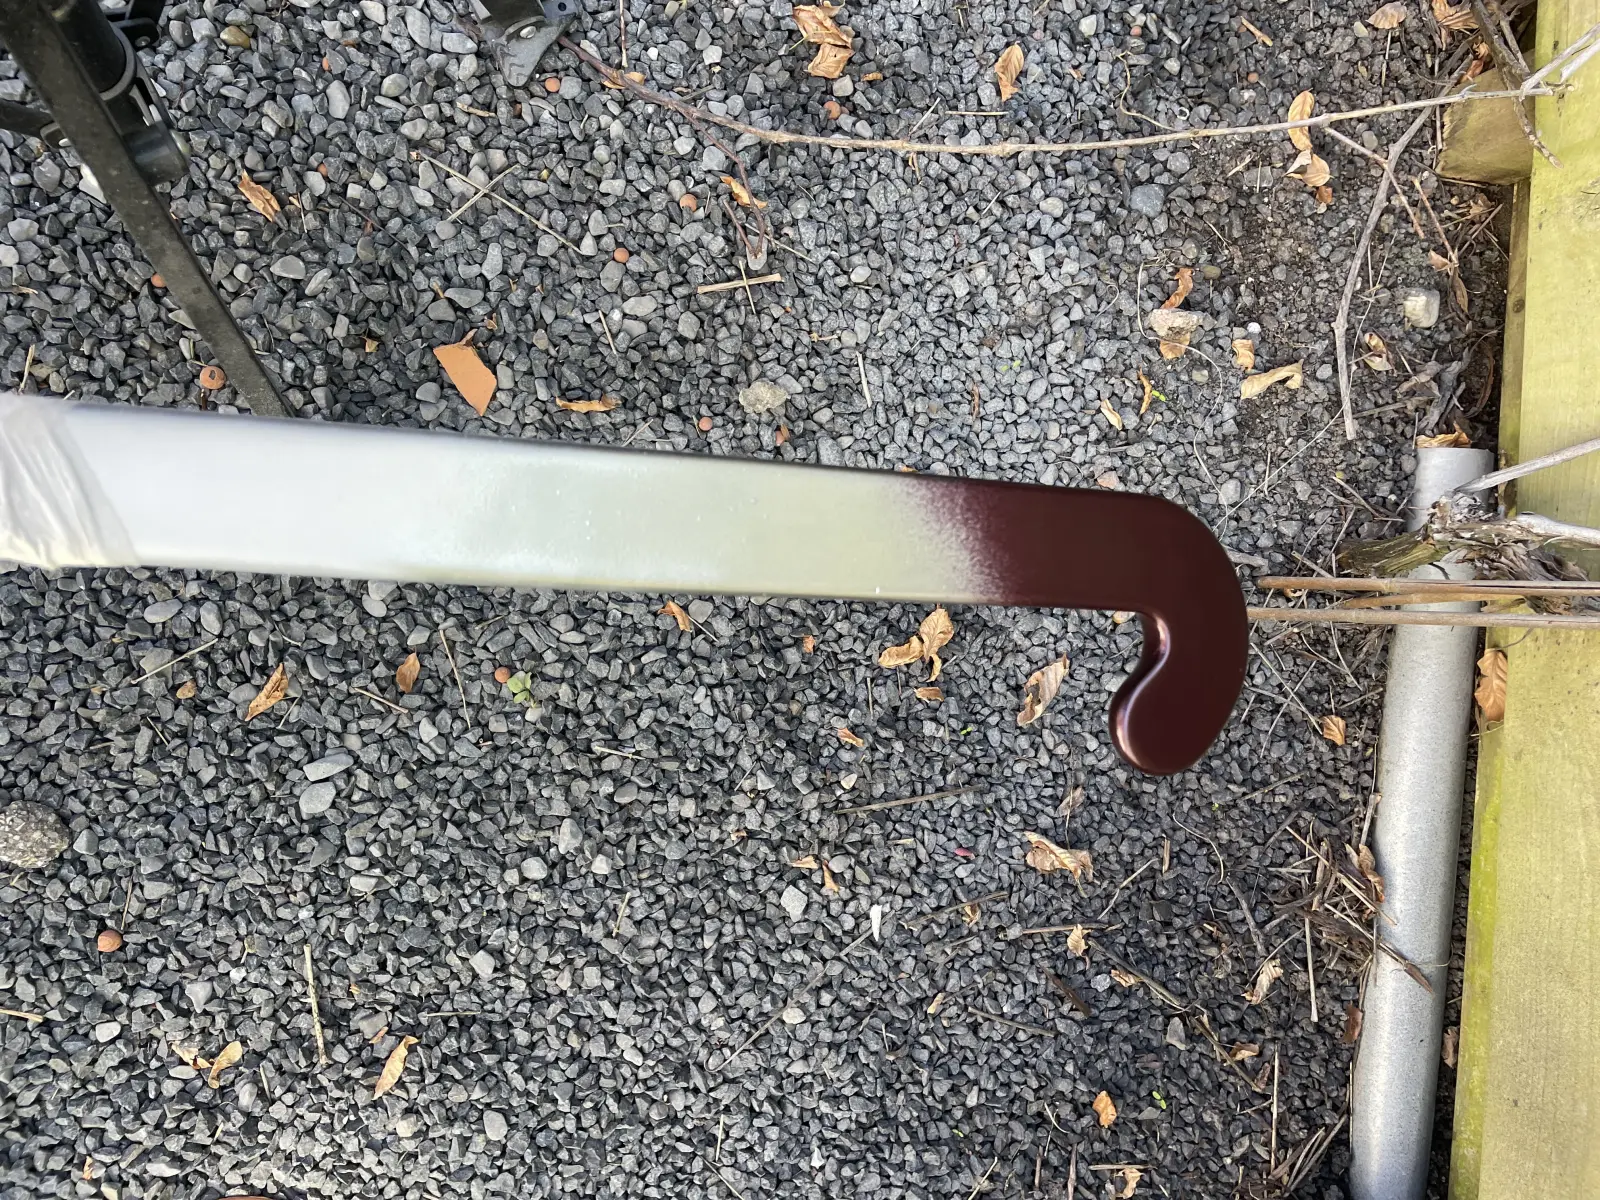
A test piece, before committing

I didn't want to spray straight onto the frame without trying the colours together first. An old hockey stick got promoted to test rig.

Hockey stick partly sprayed aubergine, partly raw carbon
Aubergine next to carbon
Hockey stick with cherry red metallic spray
Cherry red metallic
Hockey stick with chrome spray test
Metallic chrome, the decal layer

Aubergine base coat

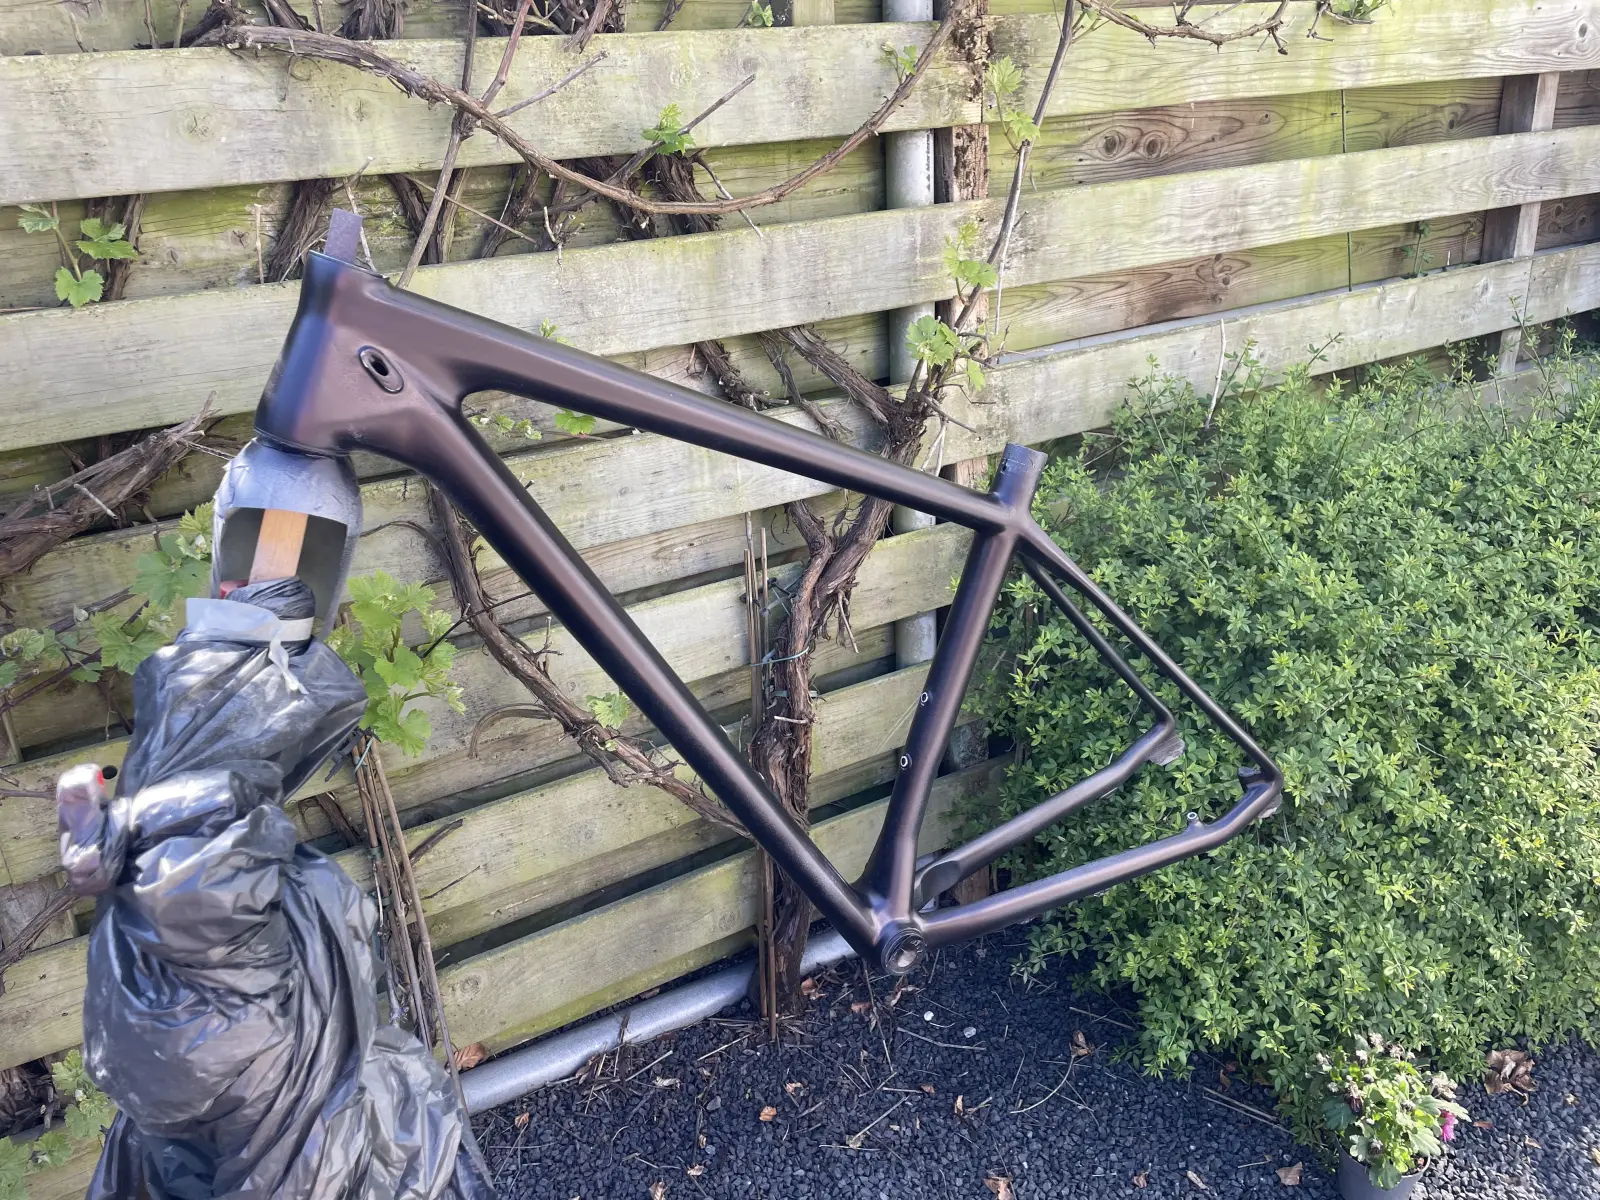
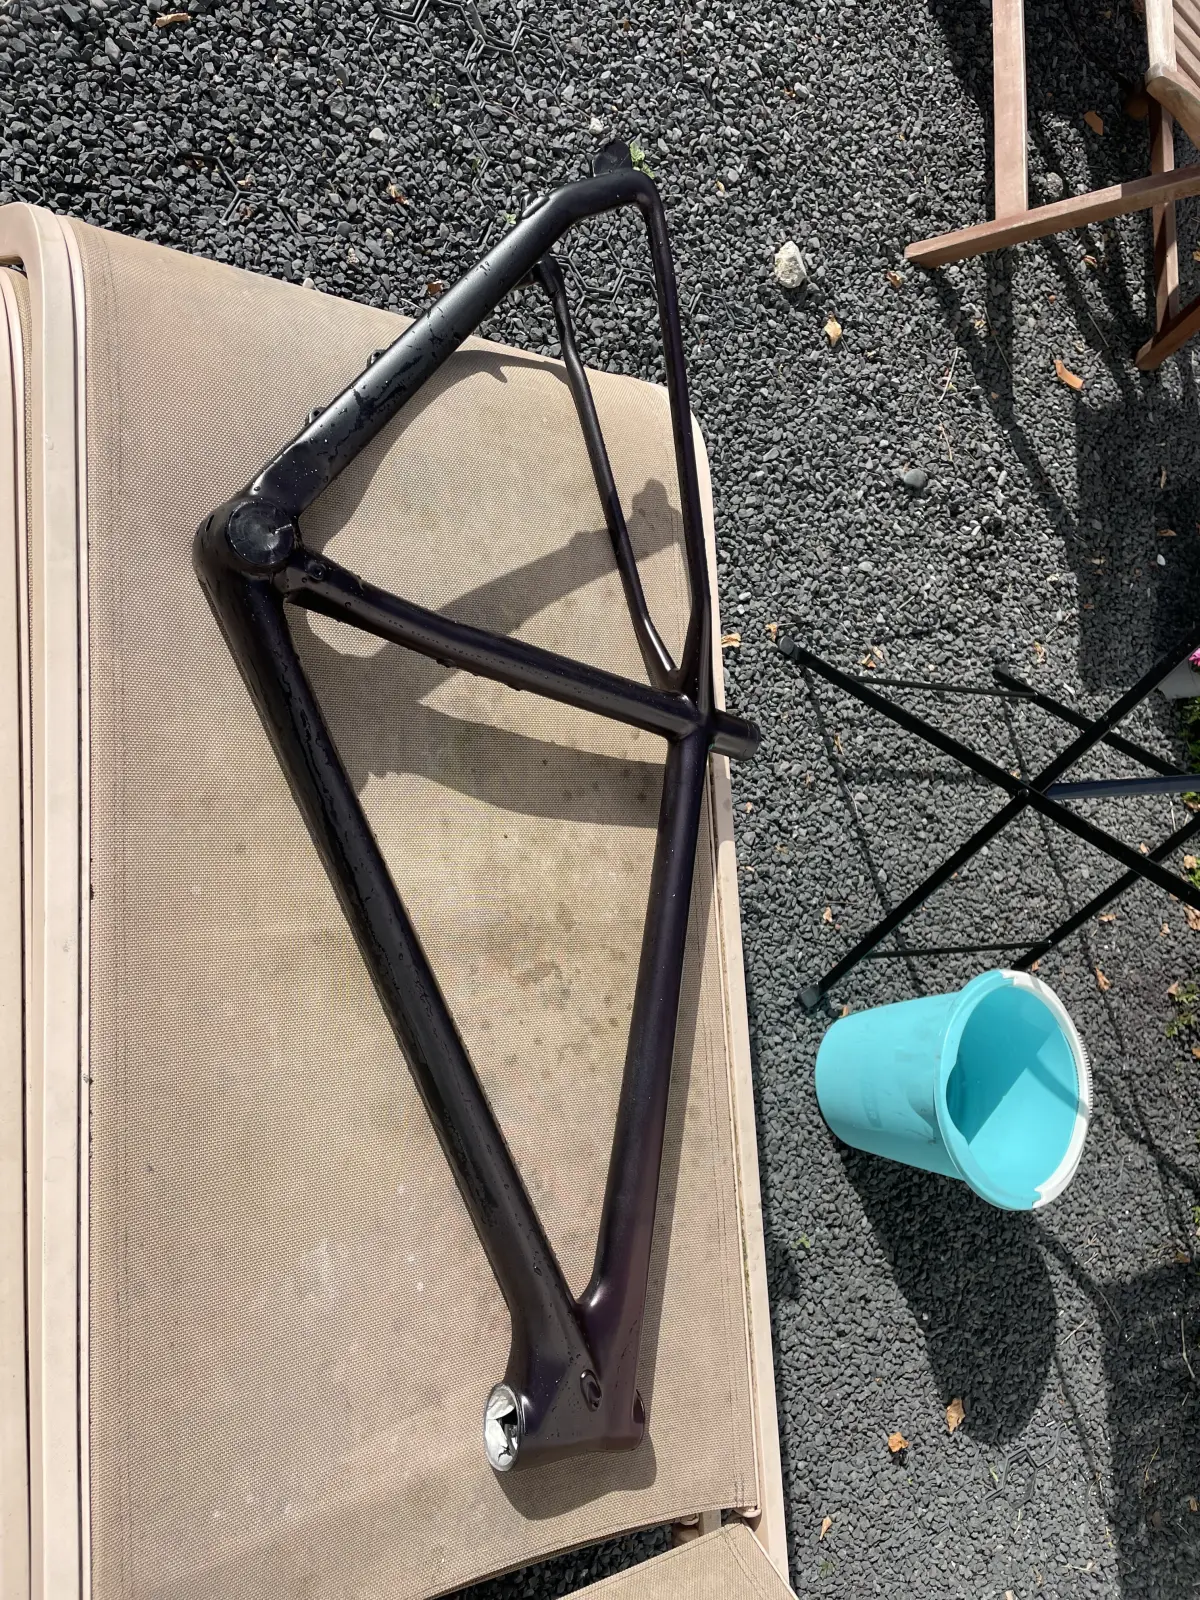
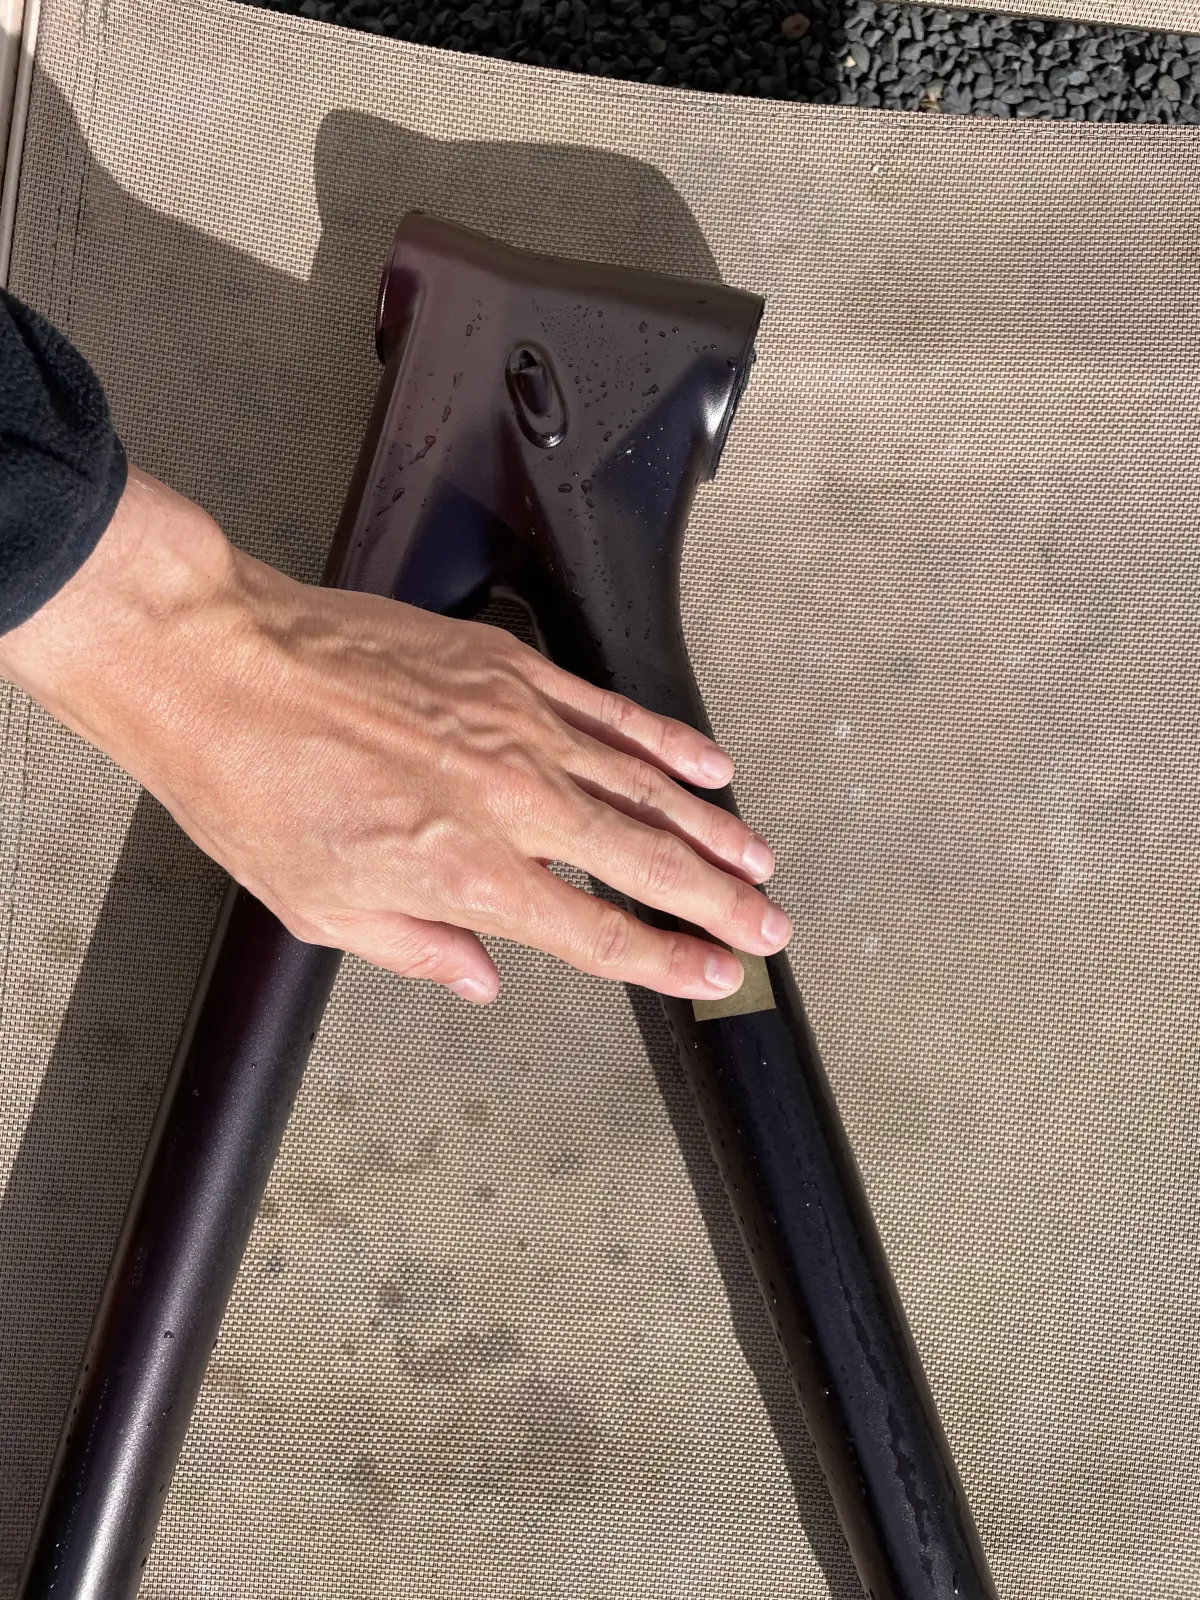
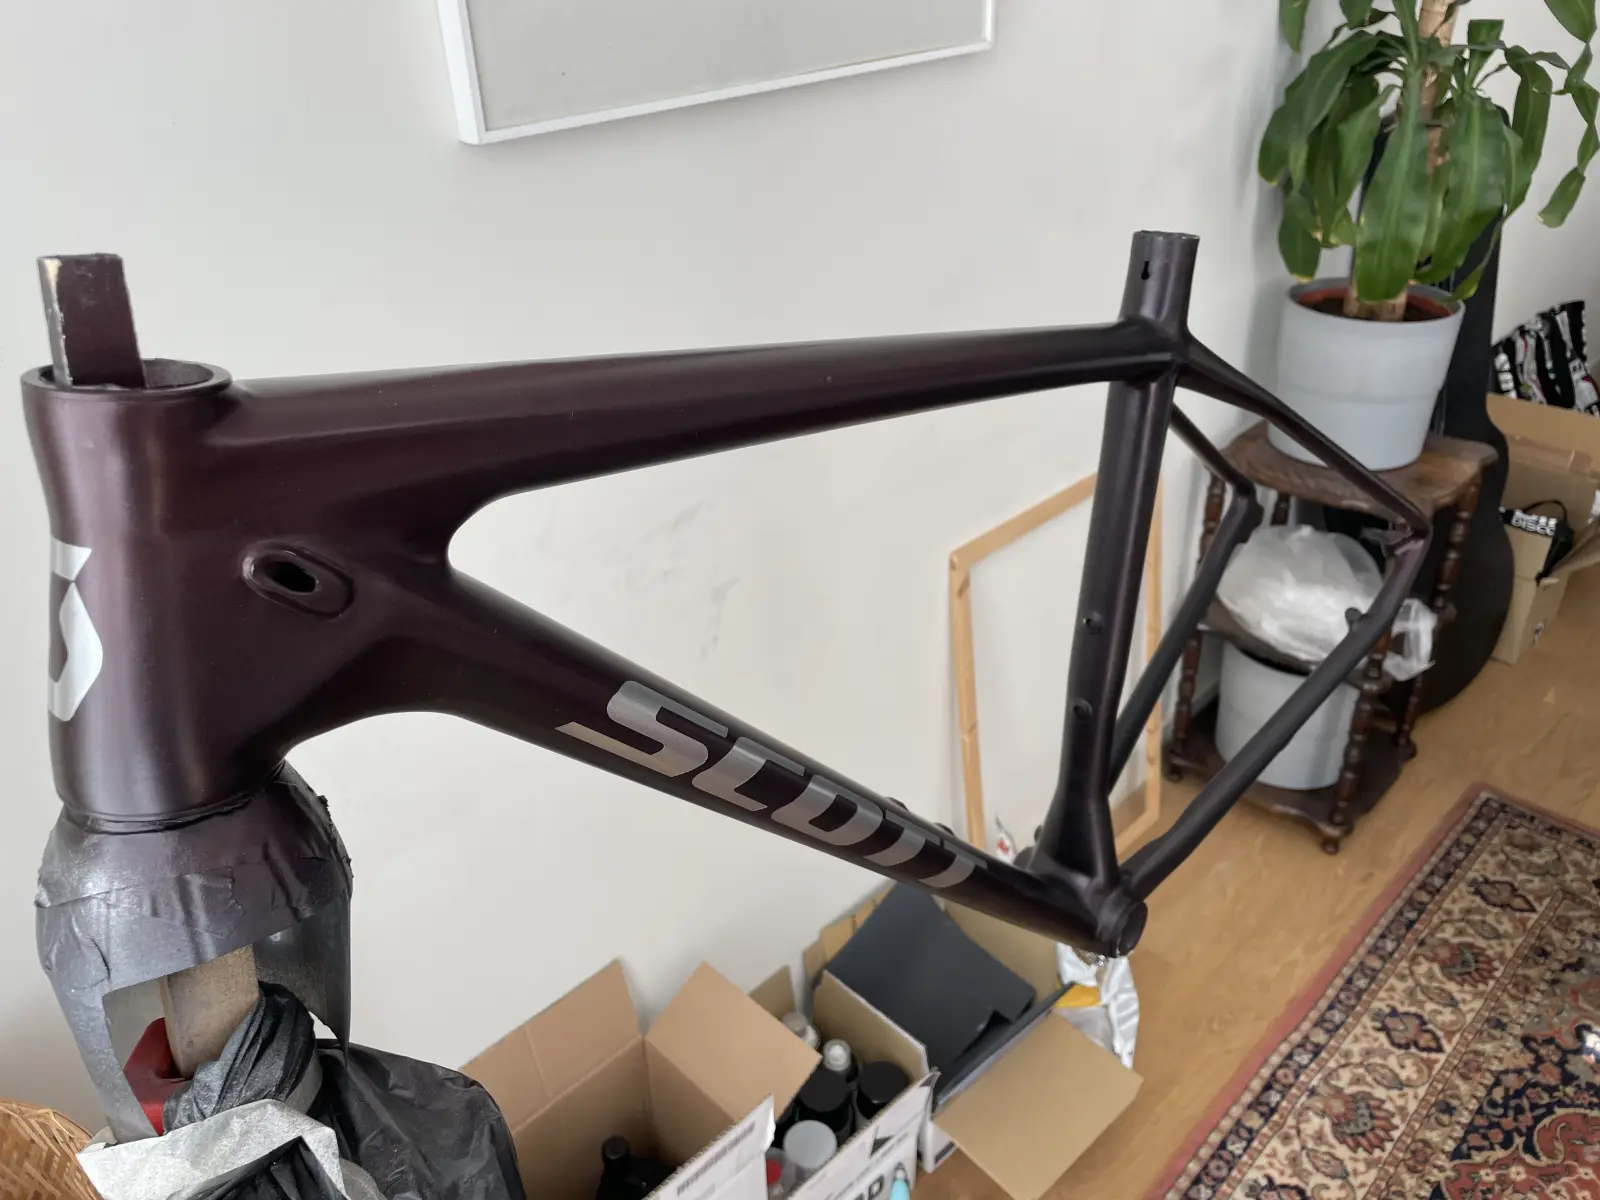
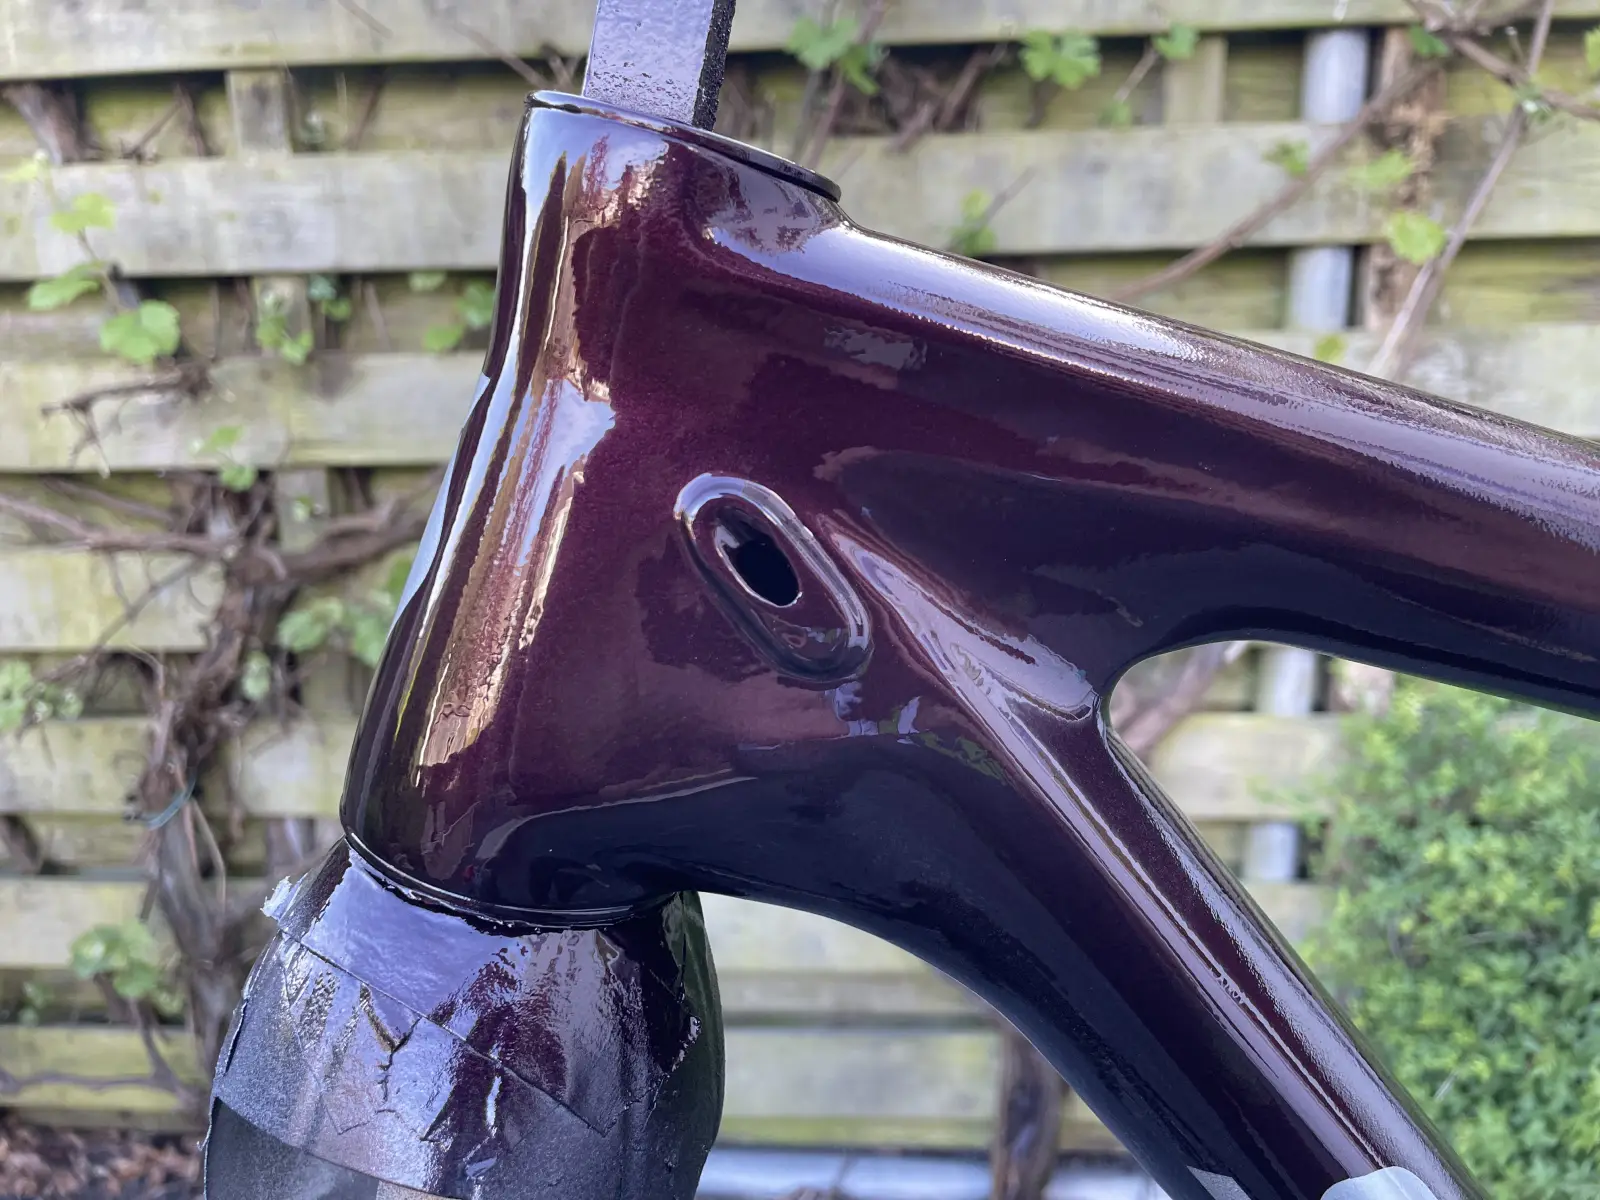
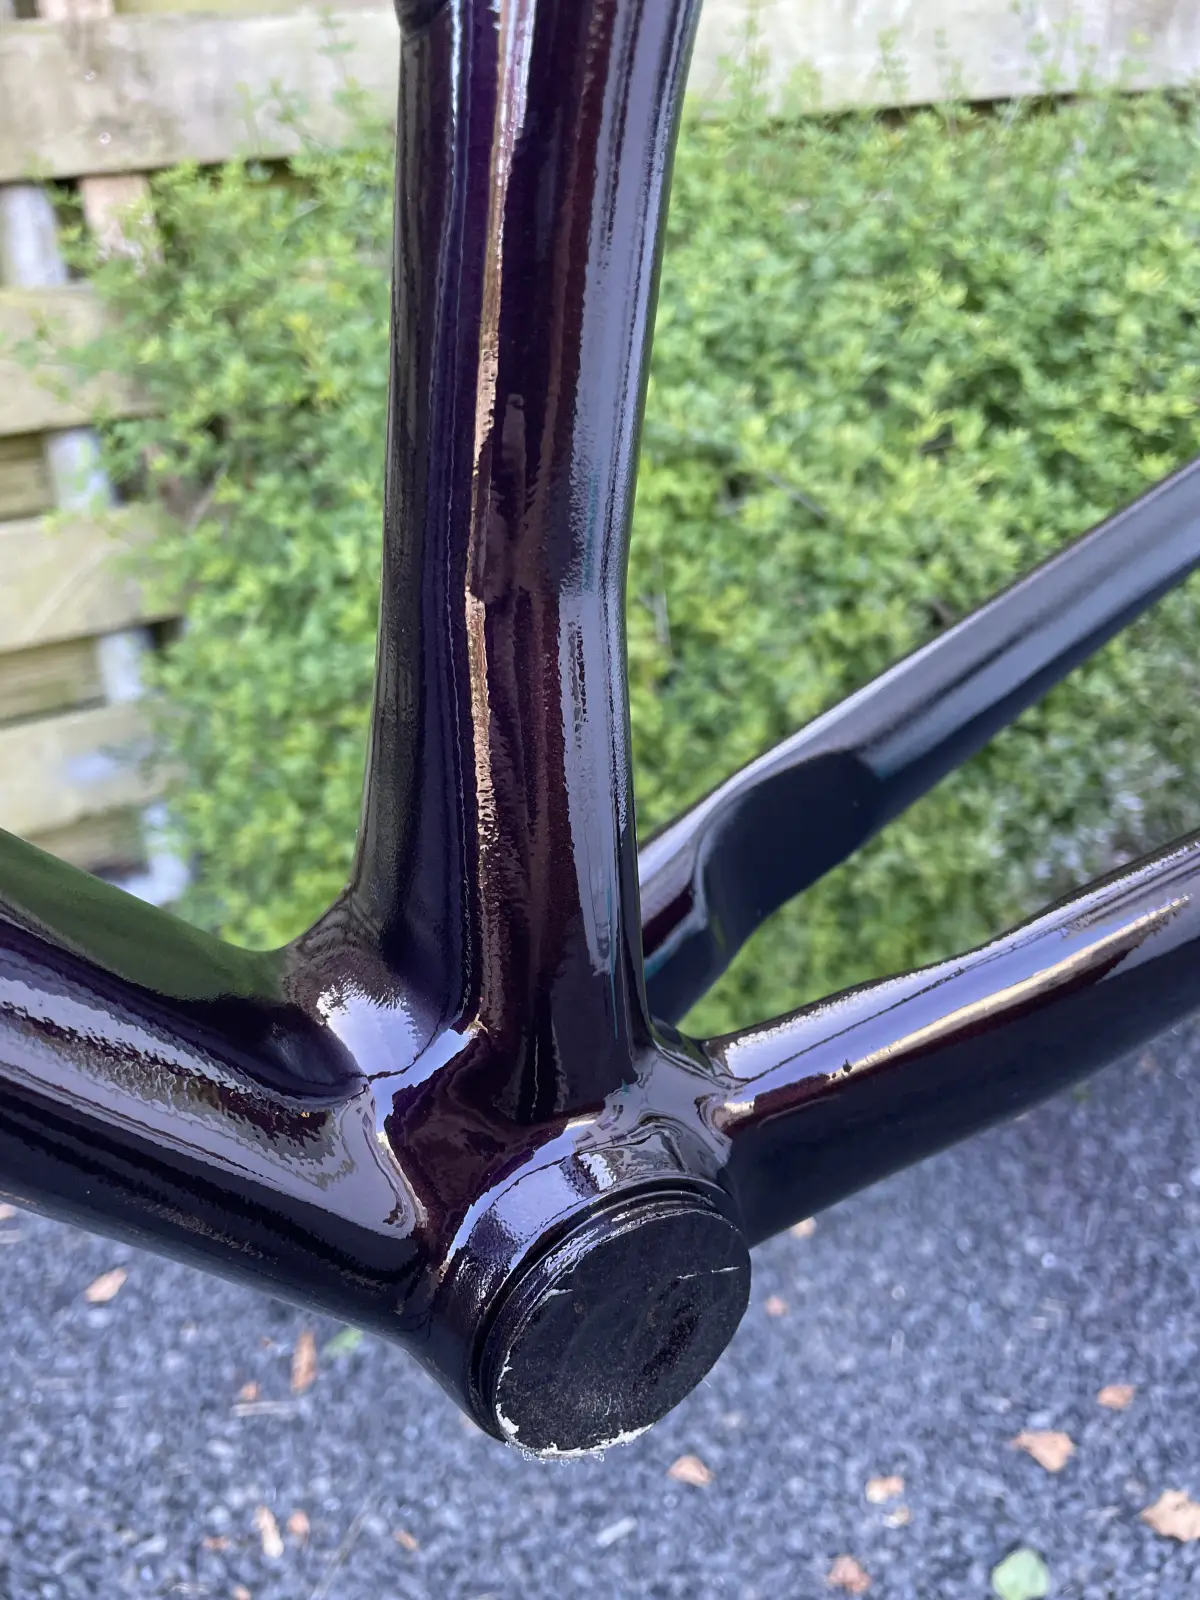
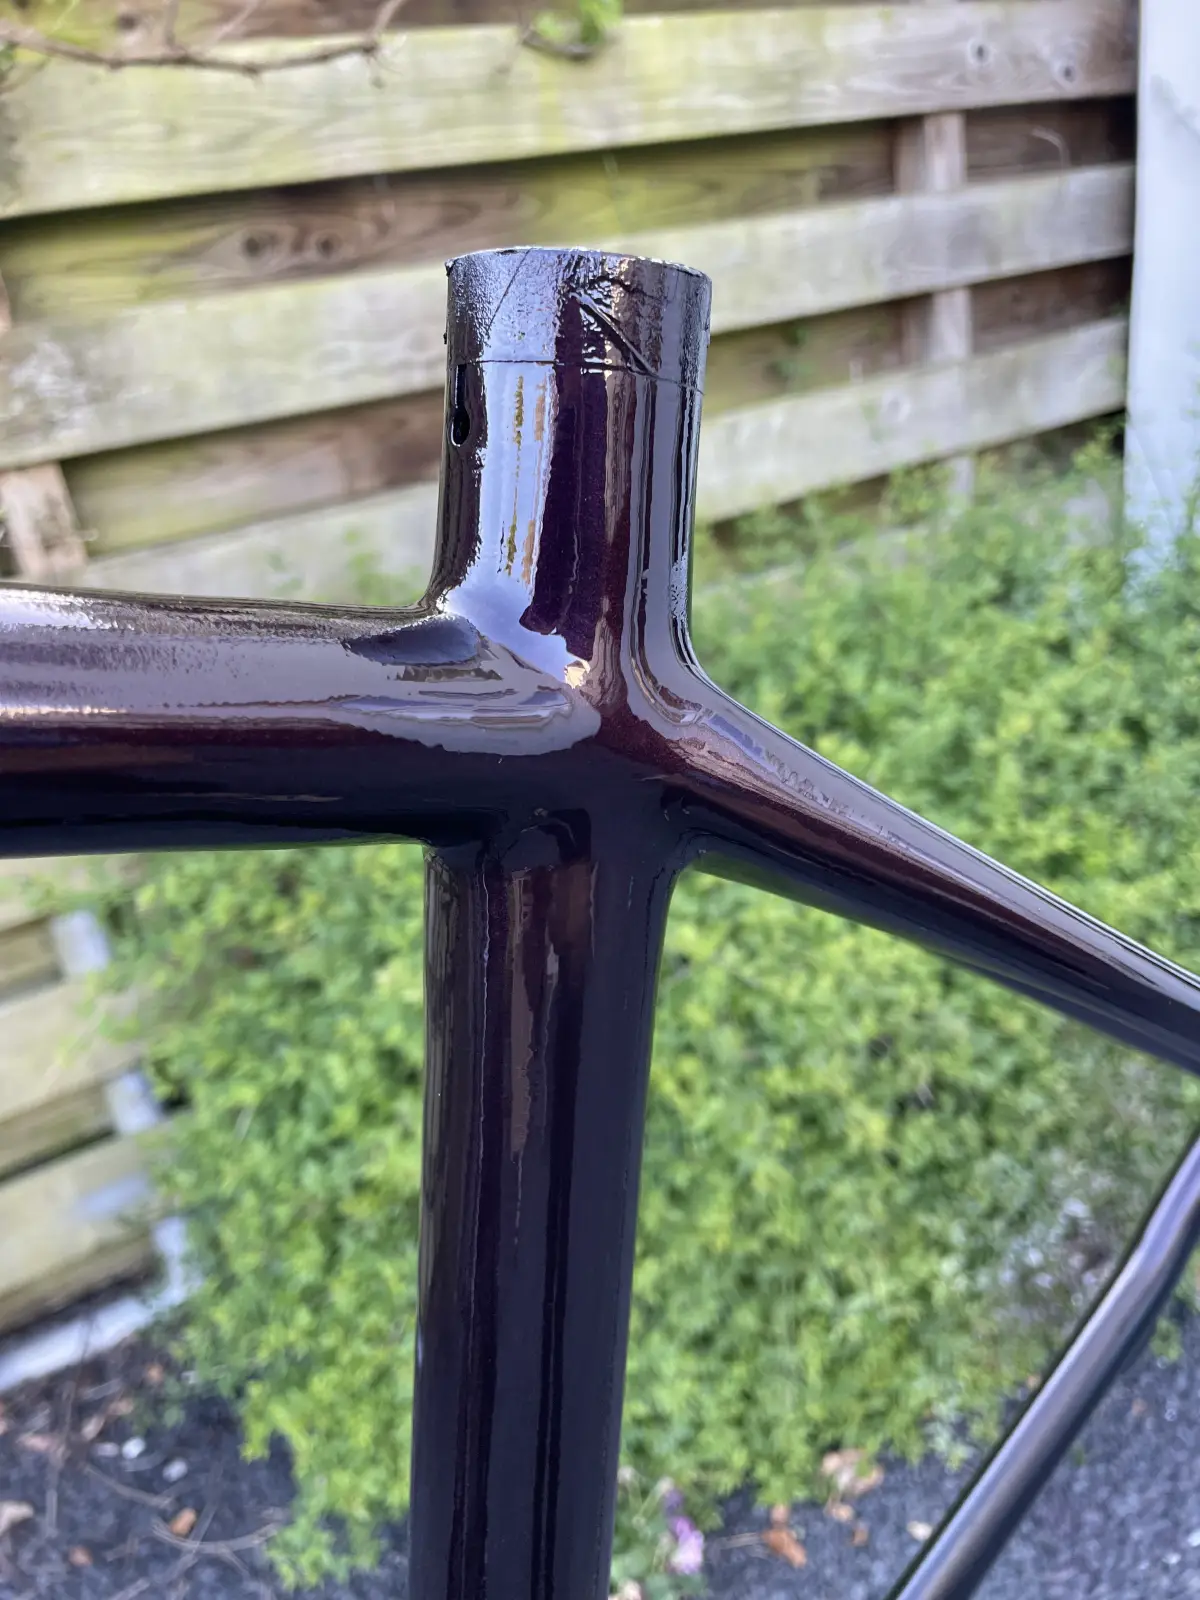
The whole frame got one full layer of metallic aubergine. Wet, deep, almost black off-axis but stunningly metallic in direct sunlight!

First aubergine coat from another angle
Aubergine metallic showing a matt finish because no clear coat is applied yet
Frame on a jig, rear angle, after the first aubergine coat
On the jig, rear three-quarter
Aubergine paint still wet on the frame
Preparing for wet sanding
Sanding the aubergine coat with fine grit between layers
Wet sanding with 1000–1500 grit

Then cherry red went on the head tube, the top of the down-tube, and along the top tube, the surfaces you see most when the bike is upright. Montana Black went at the bottom bracket and along the chain-stays, the dirty end, where mud and chain slap will live anyway.

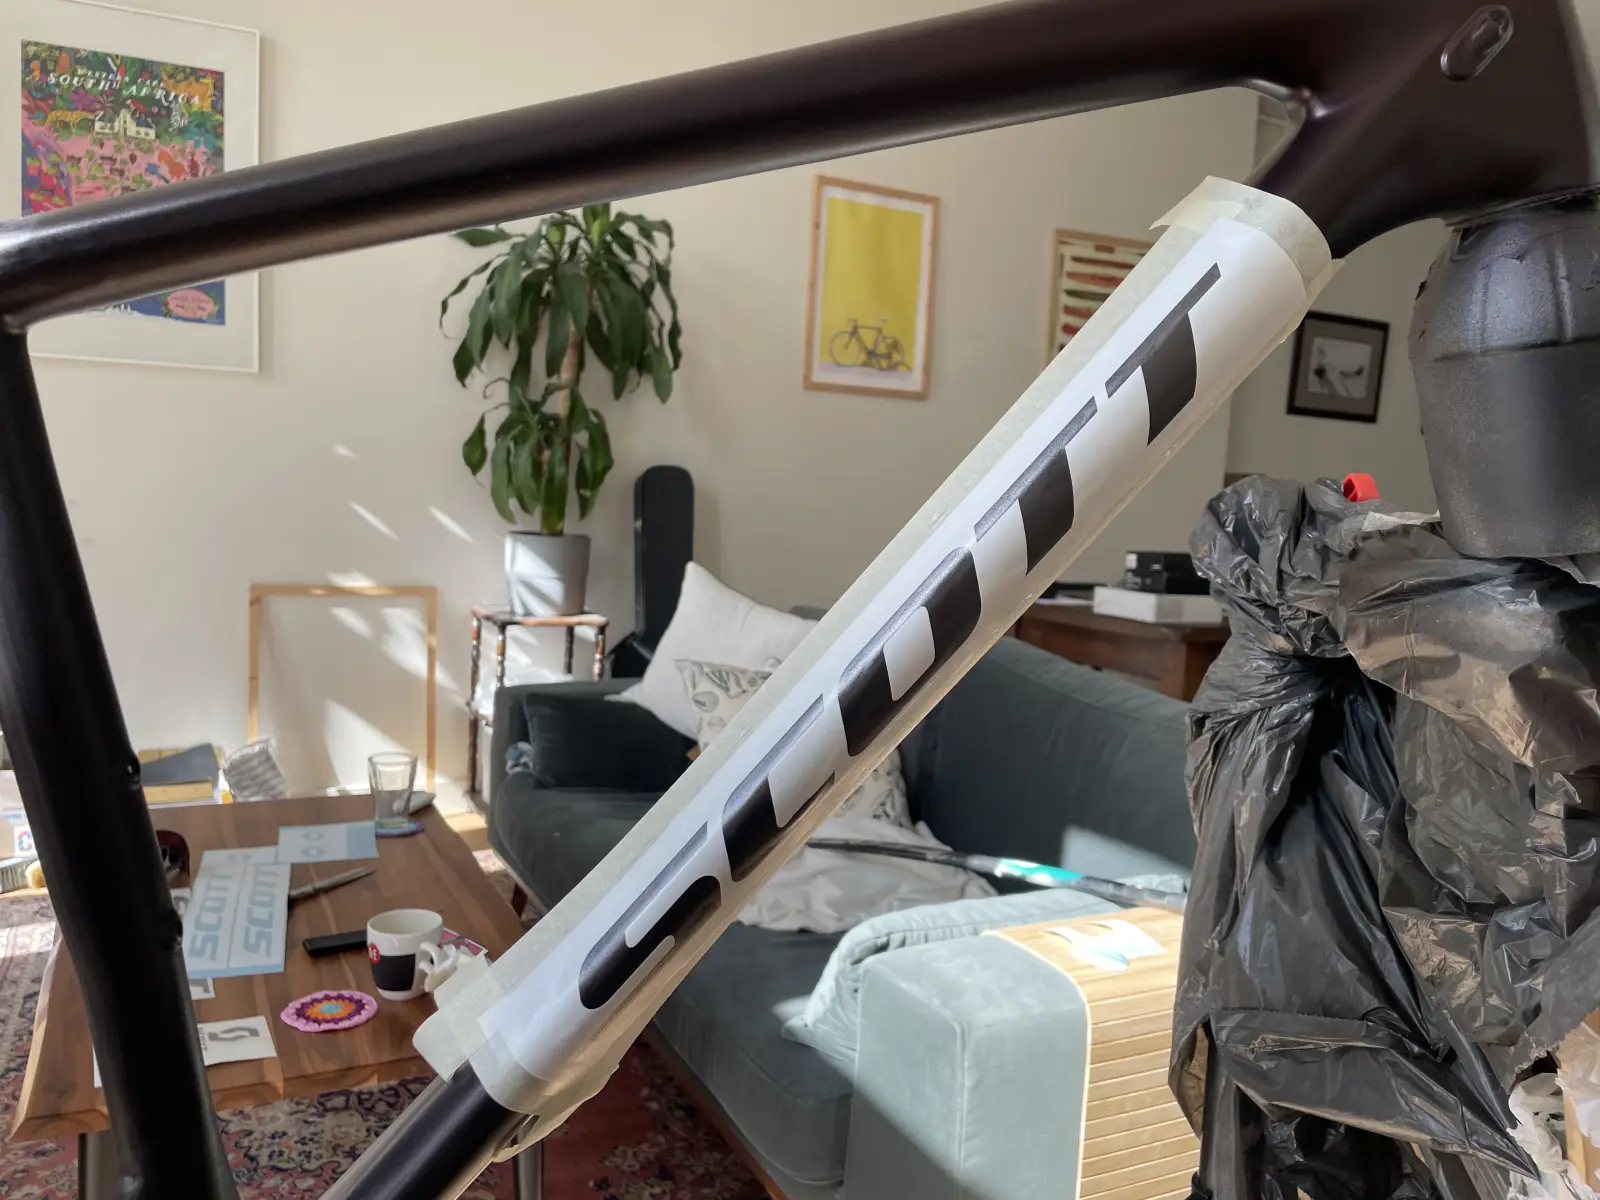
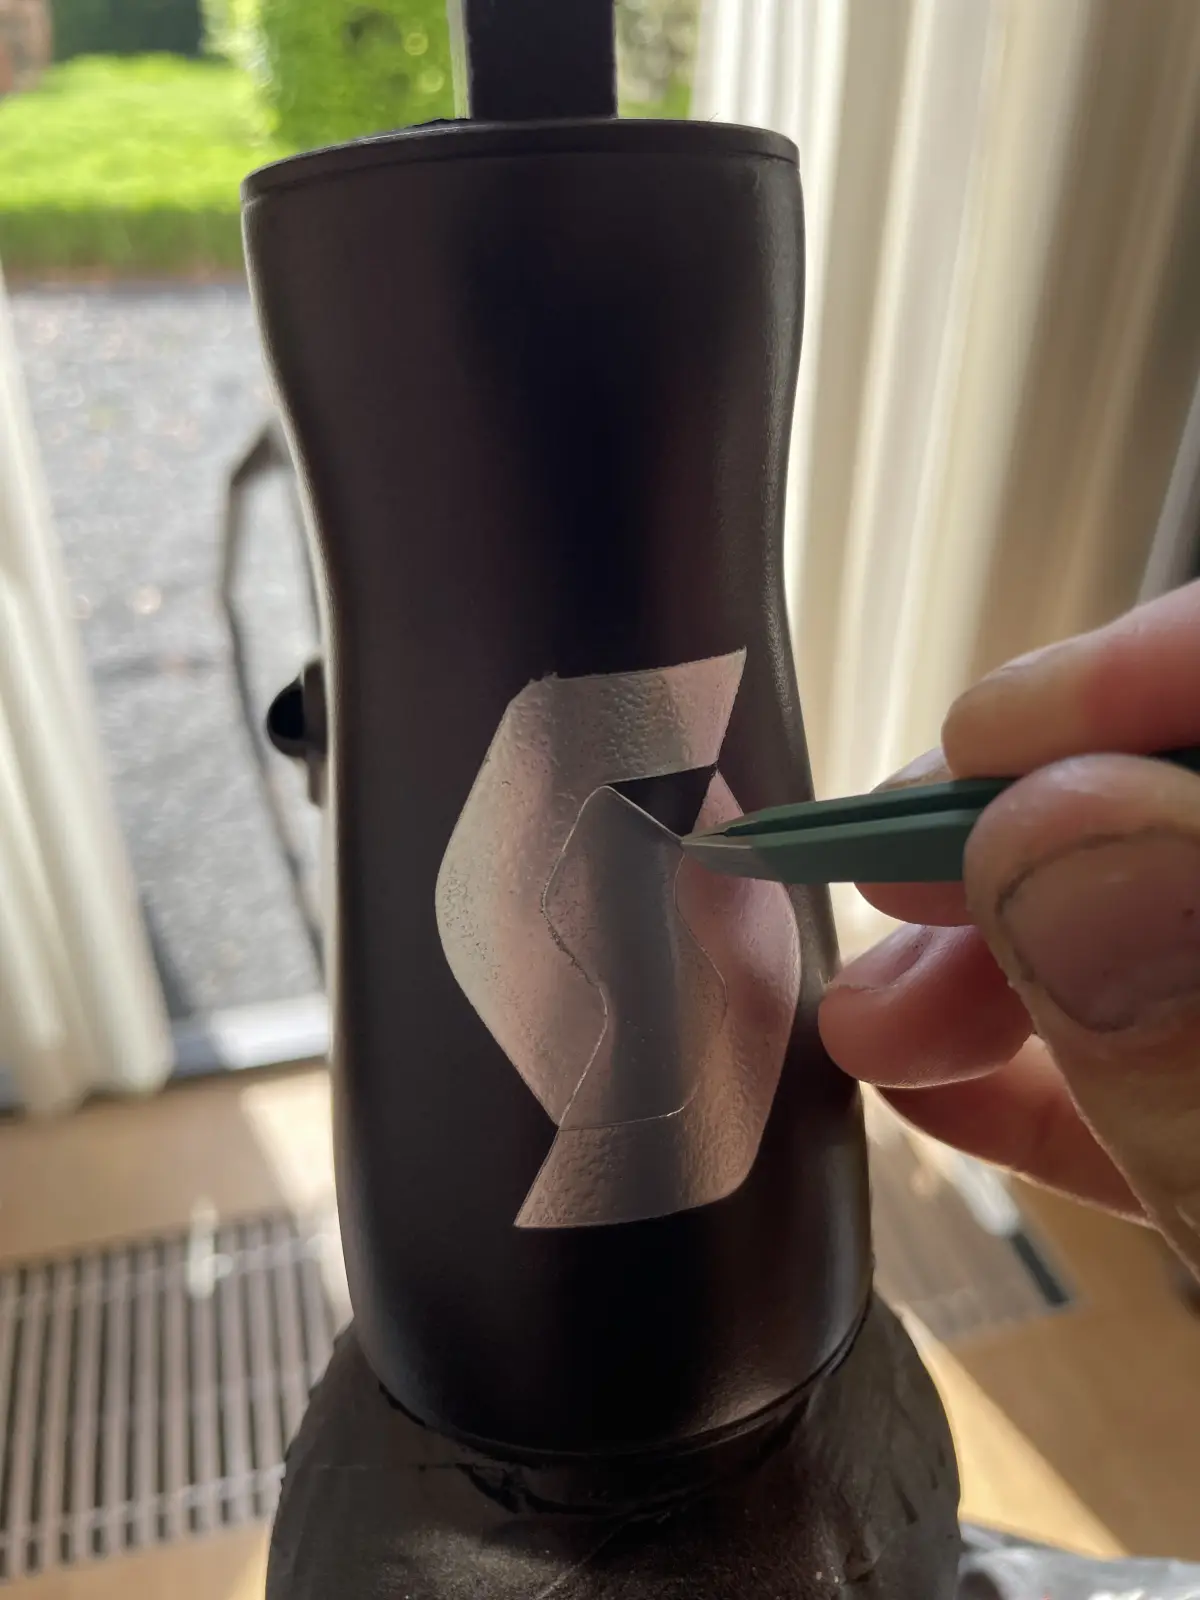
Stencil and chrome decals

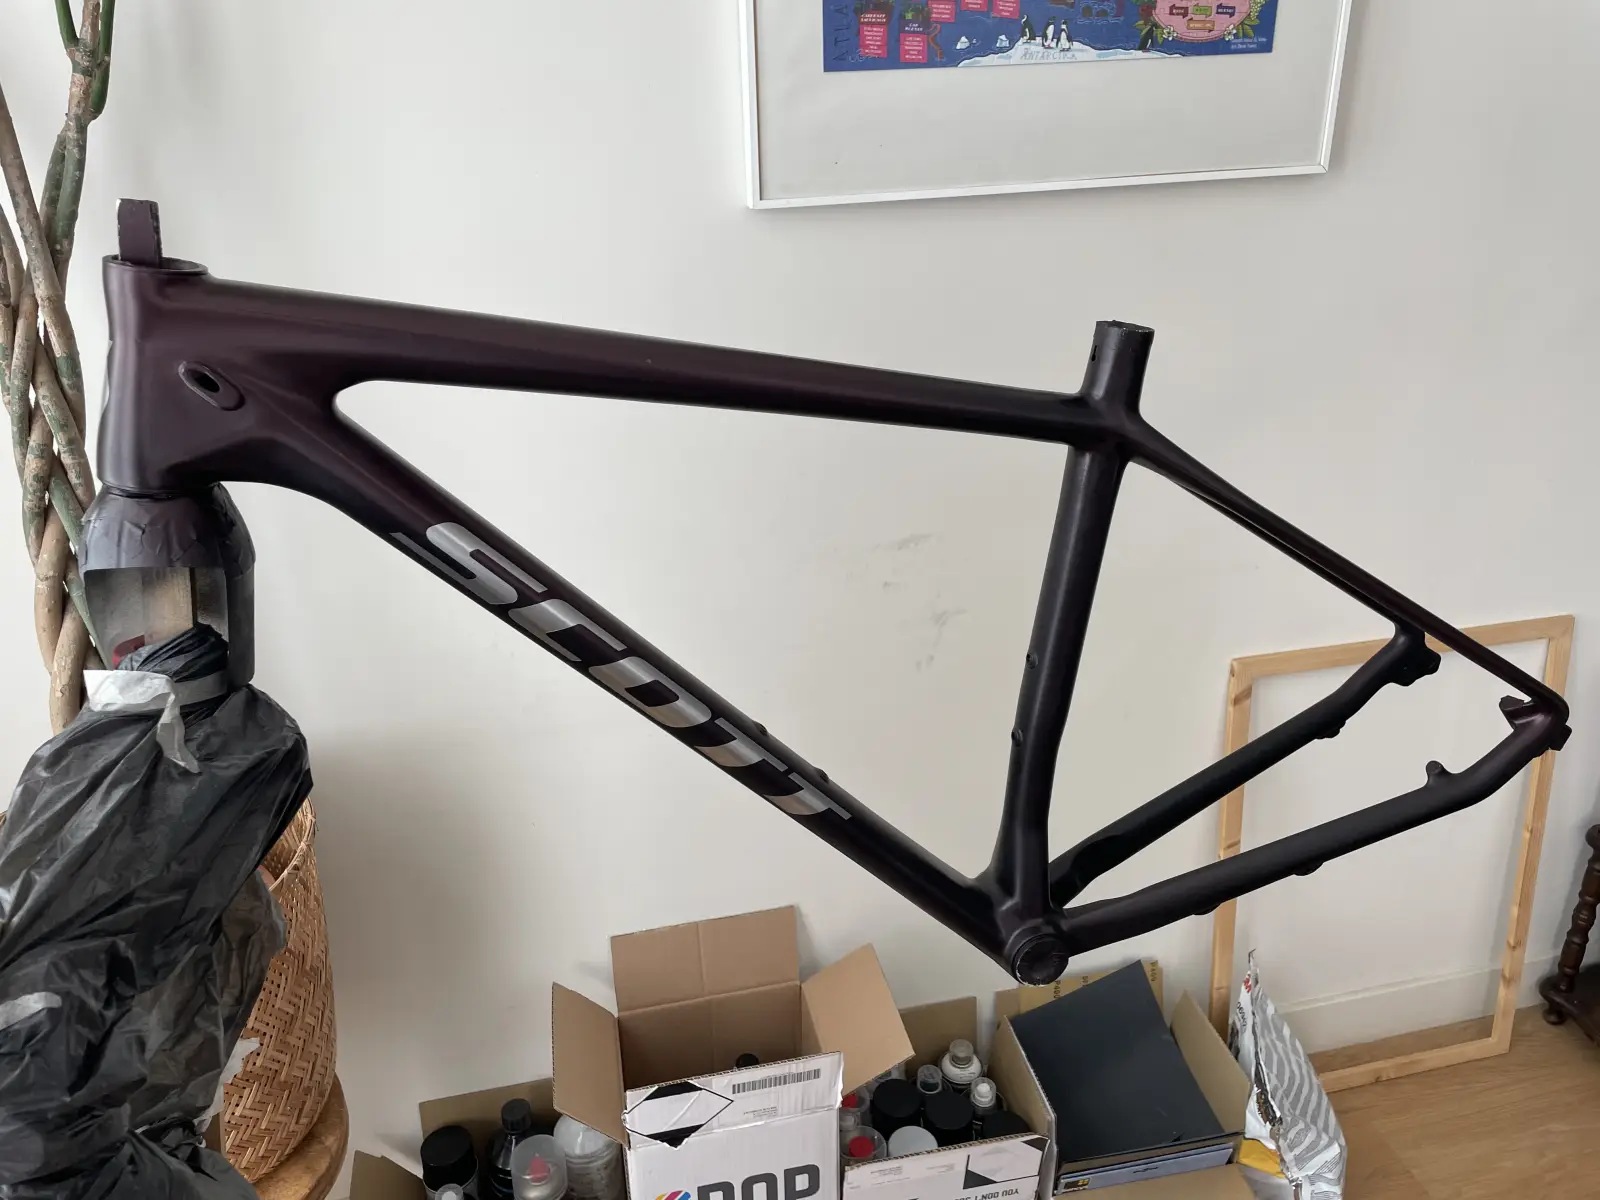
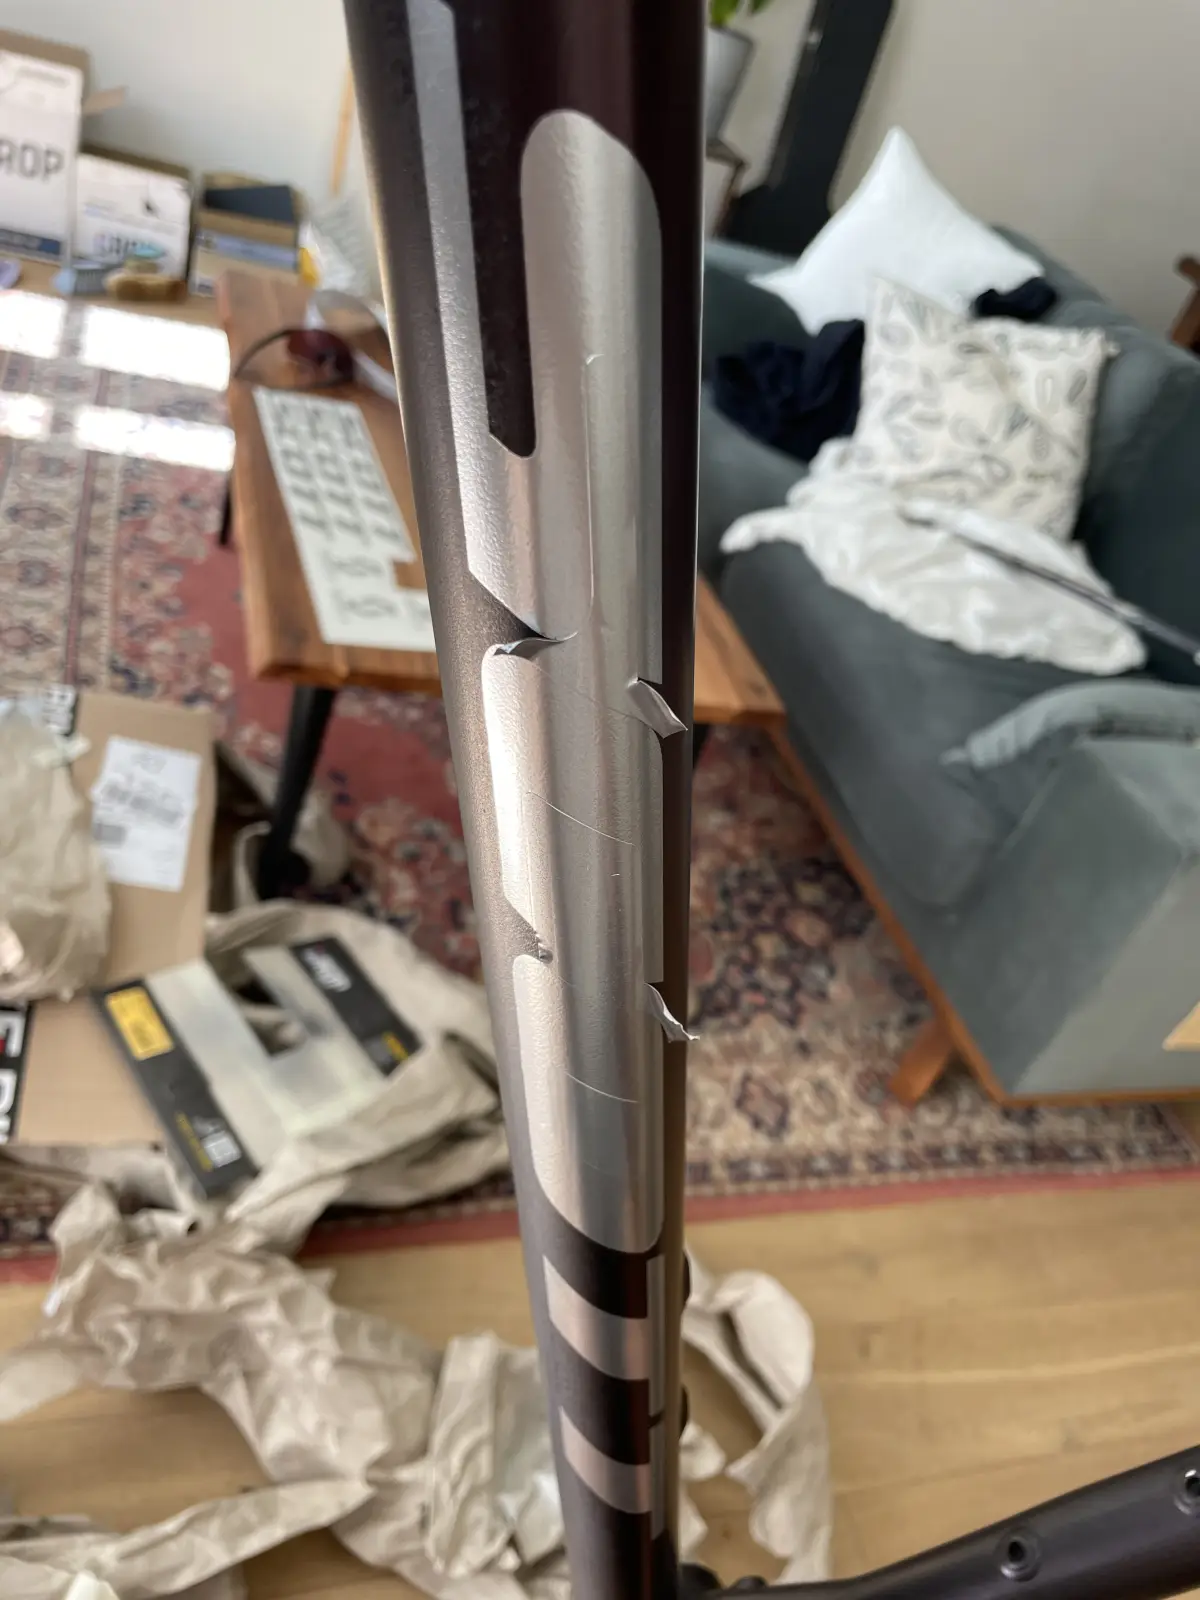
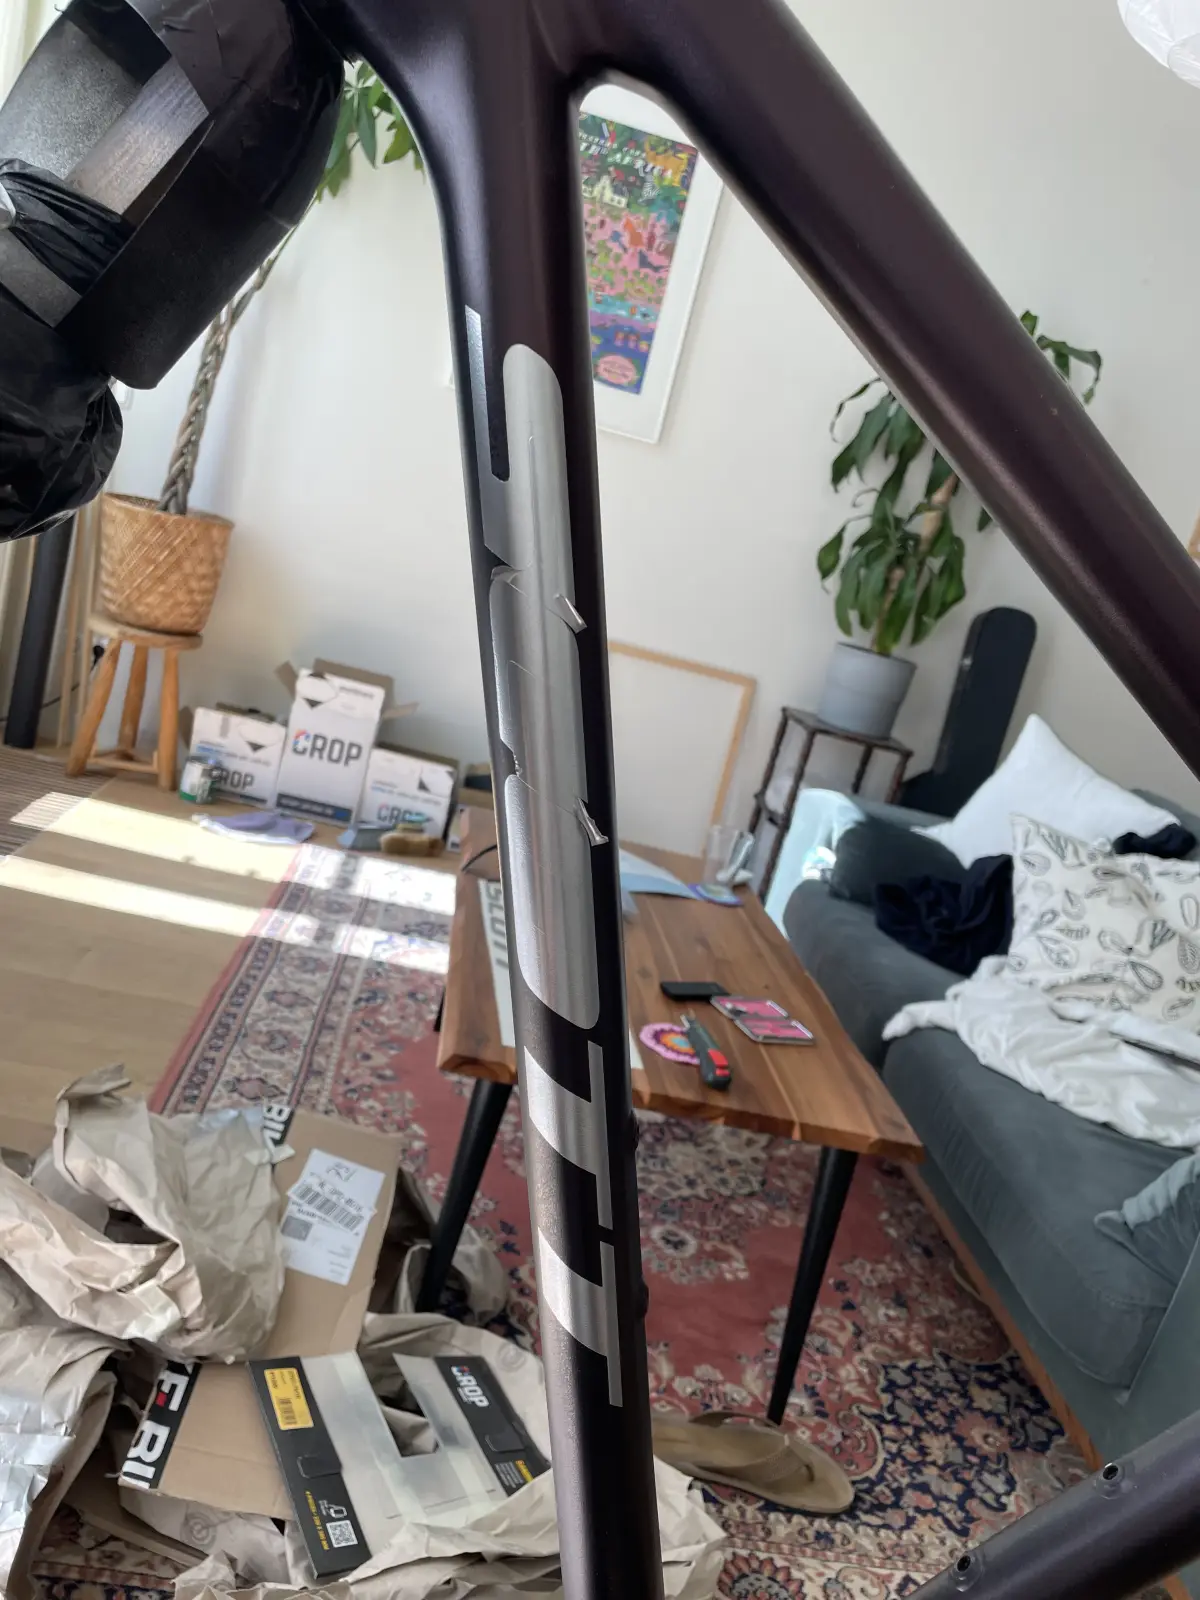
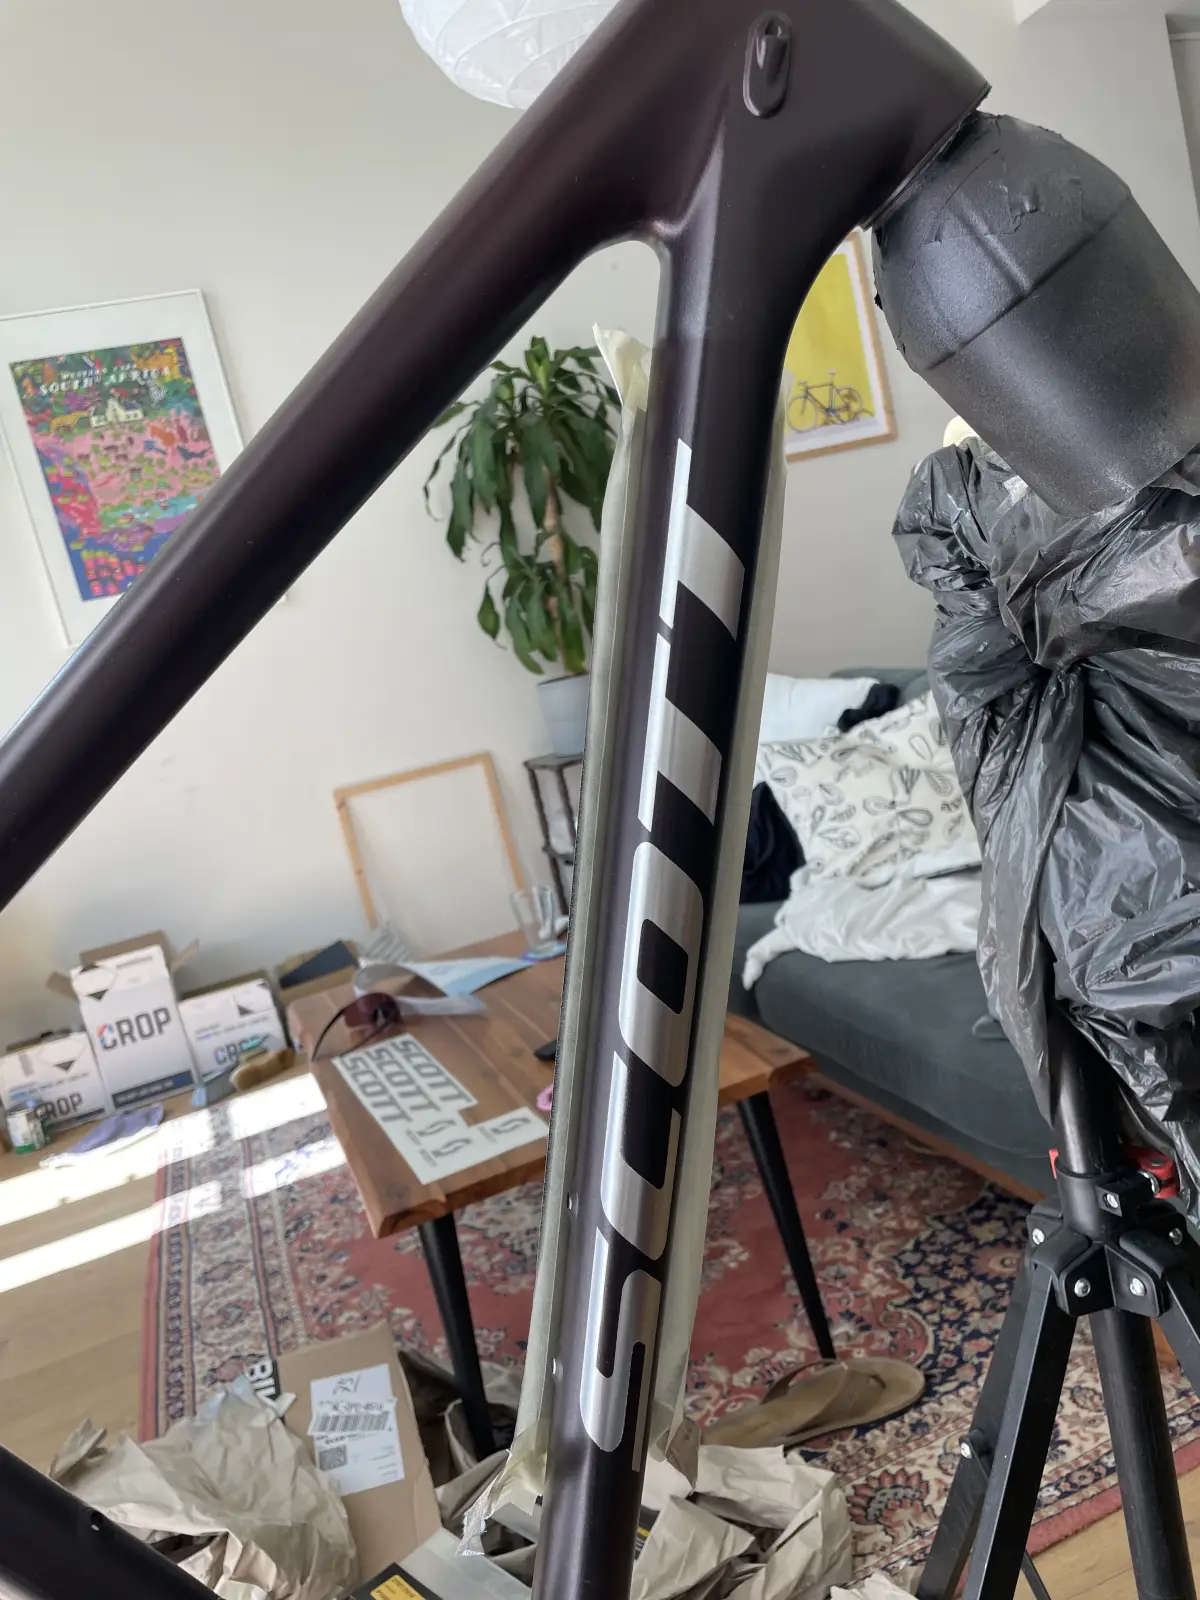
This was the most novel part of the build for me: using a stencil and a chrome spray for the logos rather than a stick-on decal. A custom stencil from an auto-parts decal shop gets taped to the frame, the rest of the bike gets masked with cardboard and paper, and chrome metallic goes through the cut-out. The reveal happens when you peel the stencil.

Down-tube: SCOTT

SCOTT stencil taped onto the down-tube before masking
Stencil placed
Frame masked off with cardboard and paper around the SCOTT stencil
Everything else masked off
Down-tube after chrome was sprayed through the SCOTT stencil, stencil still in place
Chrome down, stencil still on
Close-up of the chrome SCOTT decal on the down-tube
Close-up of the chrome
Chrome SCOTT decal from a side angle
From an angle
Peeling the SCOTT stencil off the down-tube, revealing the chrome lettering, first letters
Peel, first letters
SCOTT chrome decal fully revealed after stencil removal
More revealed
Peeling the SCOTT stencil, most of the logo visible
Almost there
Peeling the SCOTT stencil, more revealed
Fully revealed

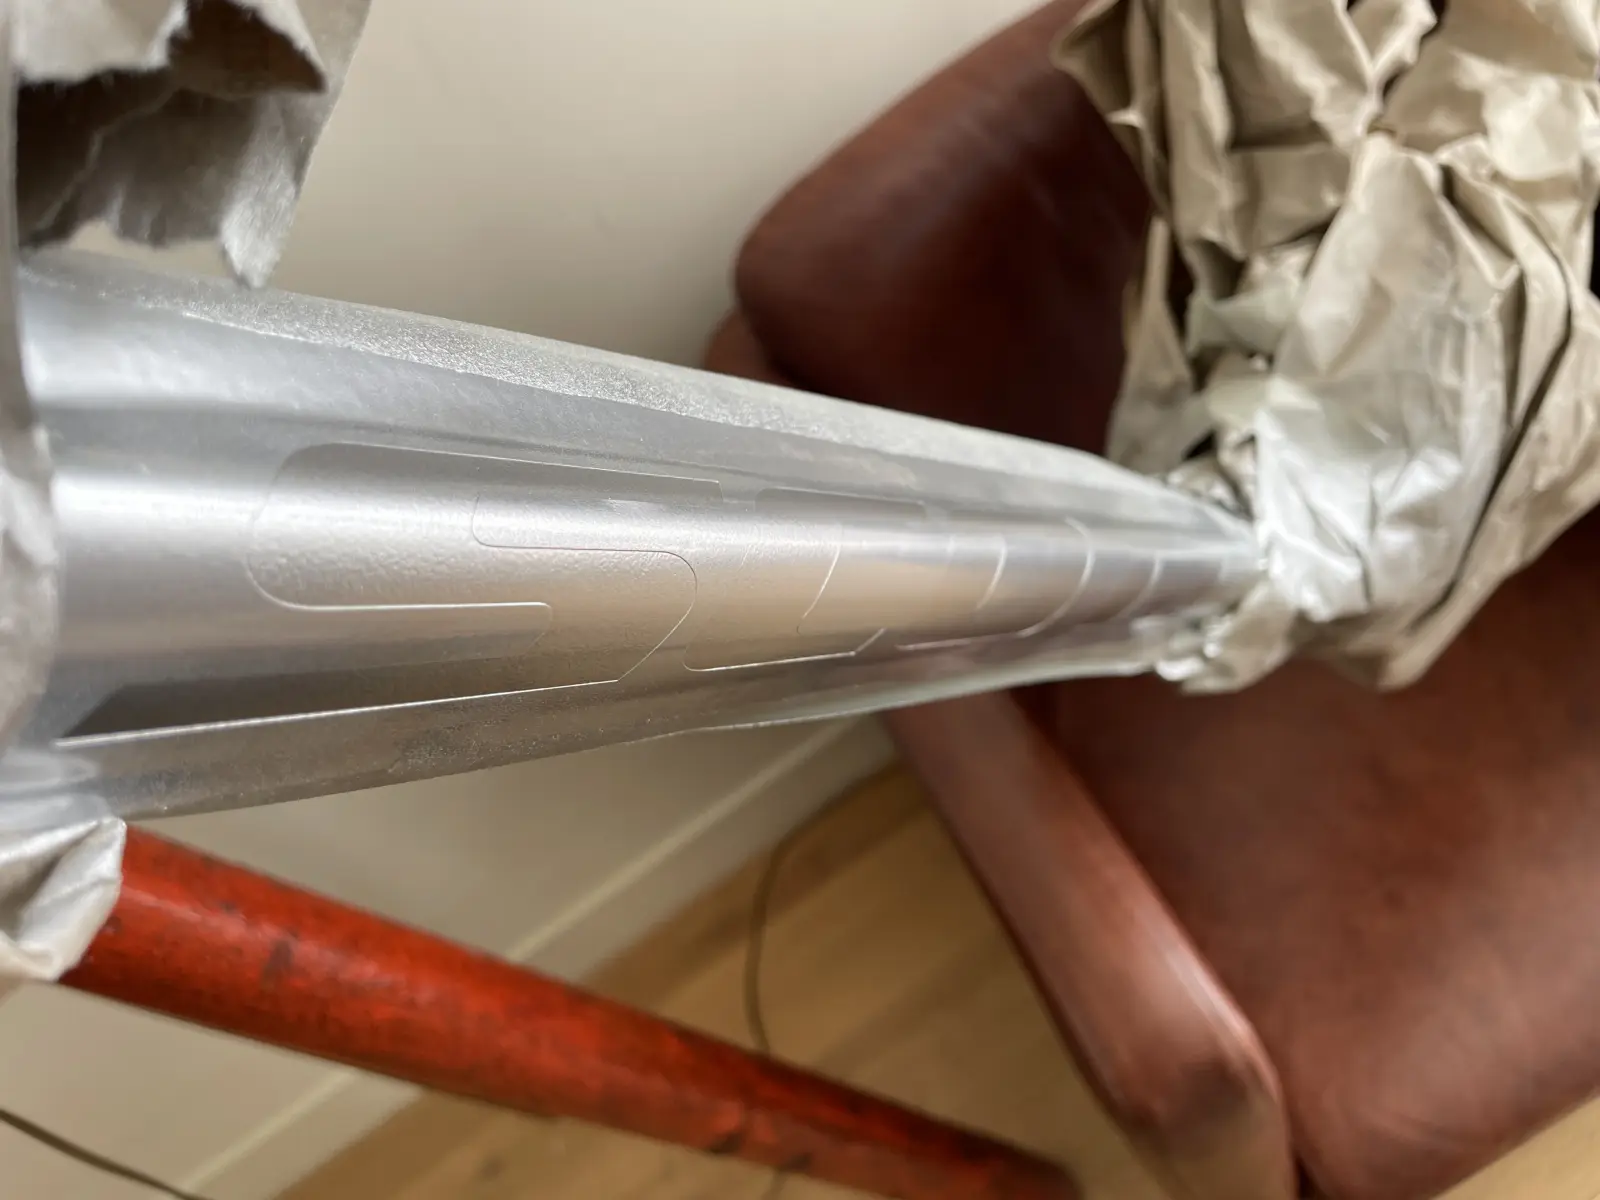
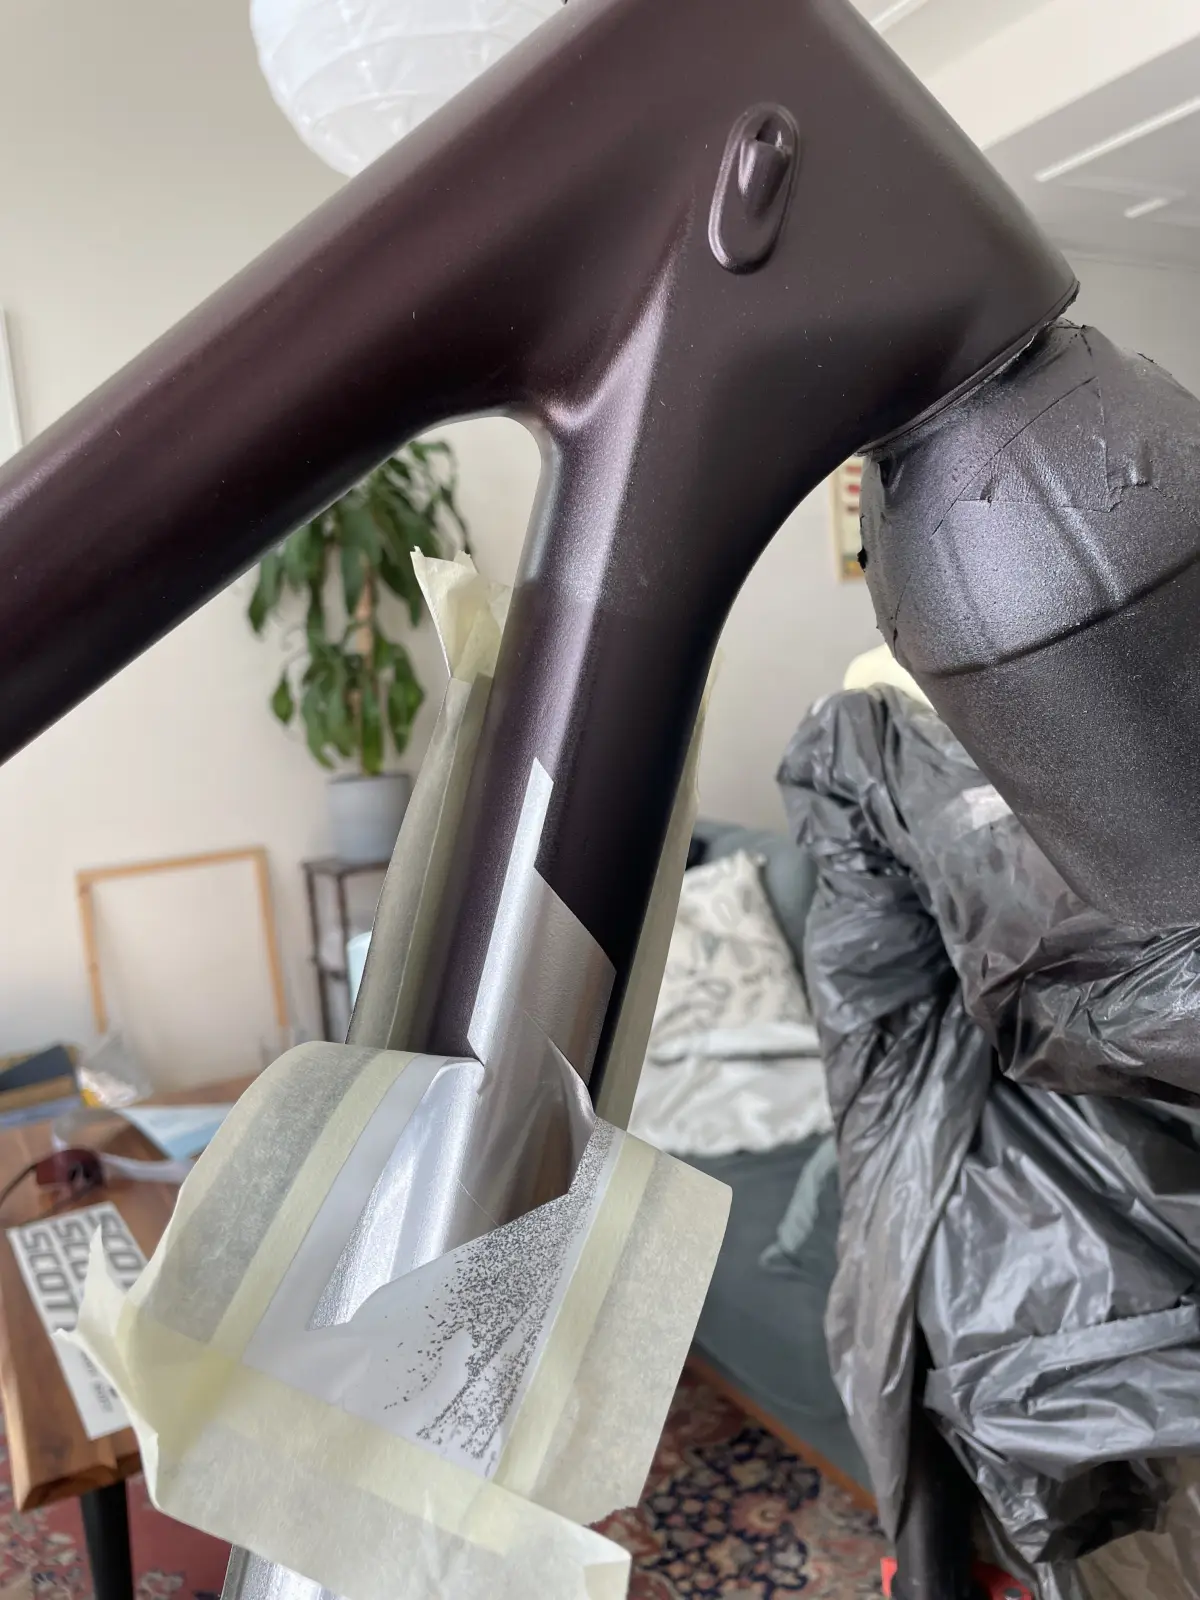
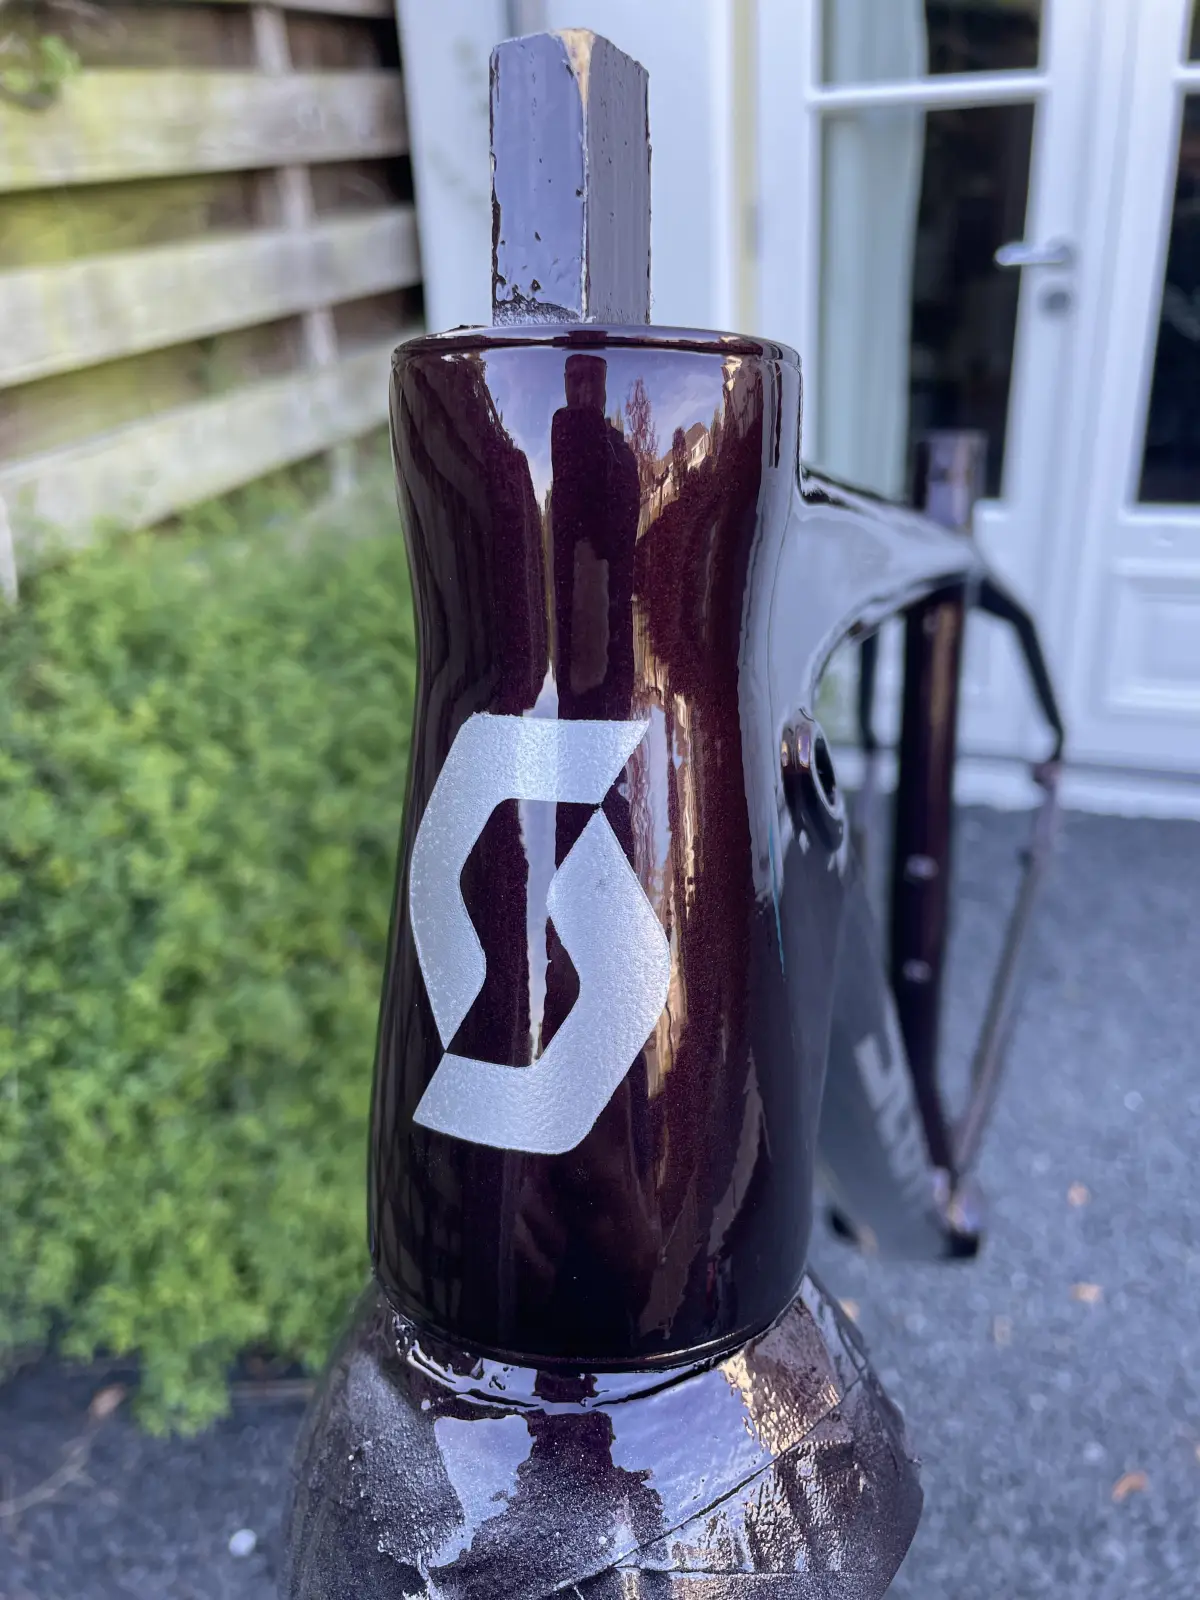
Head tube: the Scott "S"

Same idea, smaller stencil, finer work. Tweezers needed to lift the stencil away cleanly without dragging the chrome.

Scott S-icon stencil taped onto the head tube
Stencil on the head tube
Head tube after chrome was sprayed through the S-icon stencil
Chrome sprayed
Lifting the S-icon stencil off the head tube with tweezers
Lift with tweezers
Final chrome S-icon on the head tube after stencil removal
The S, revealed

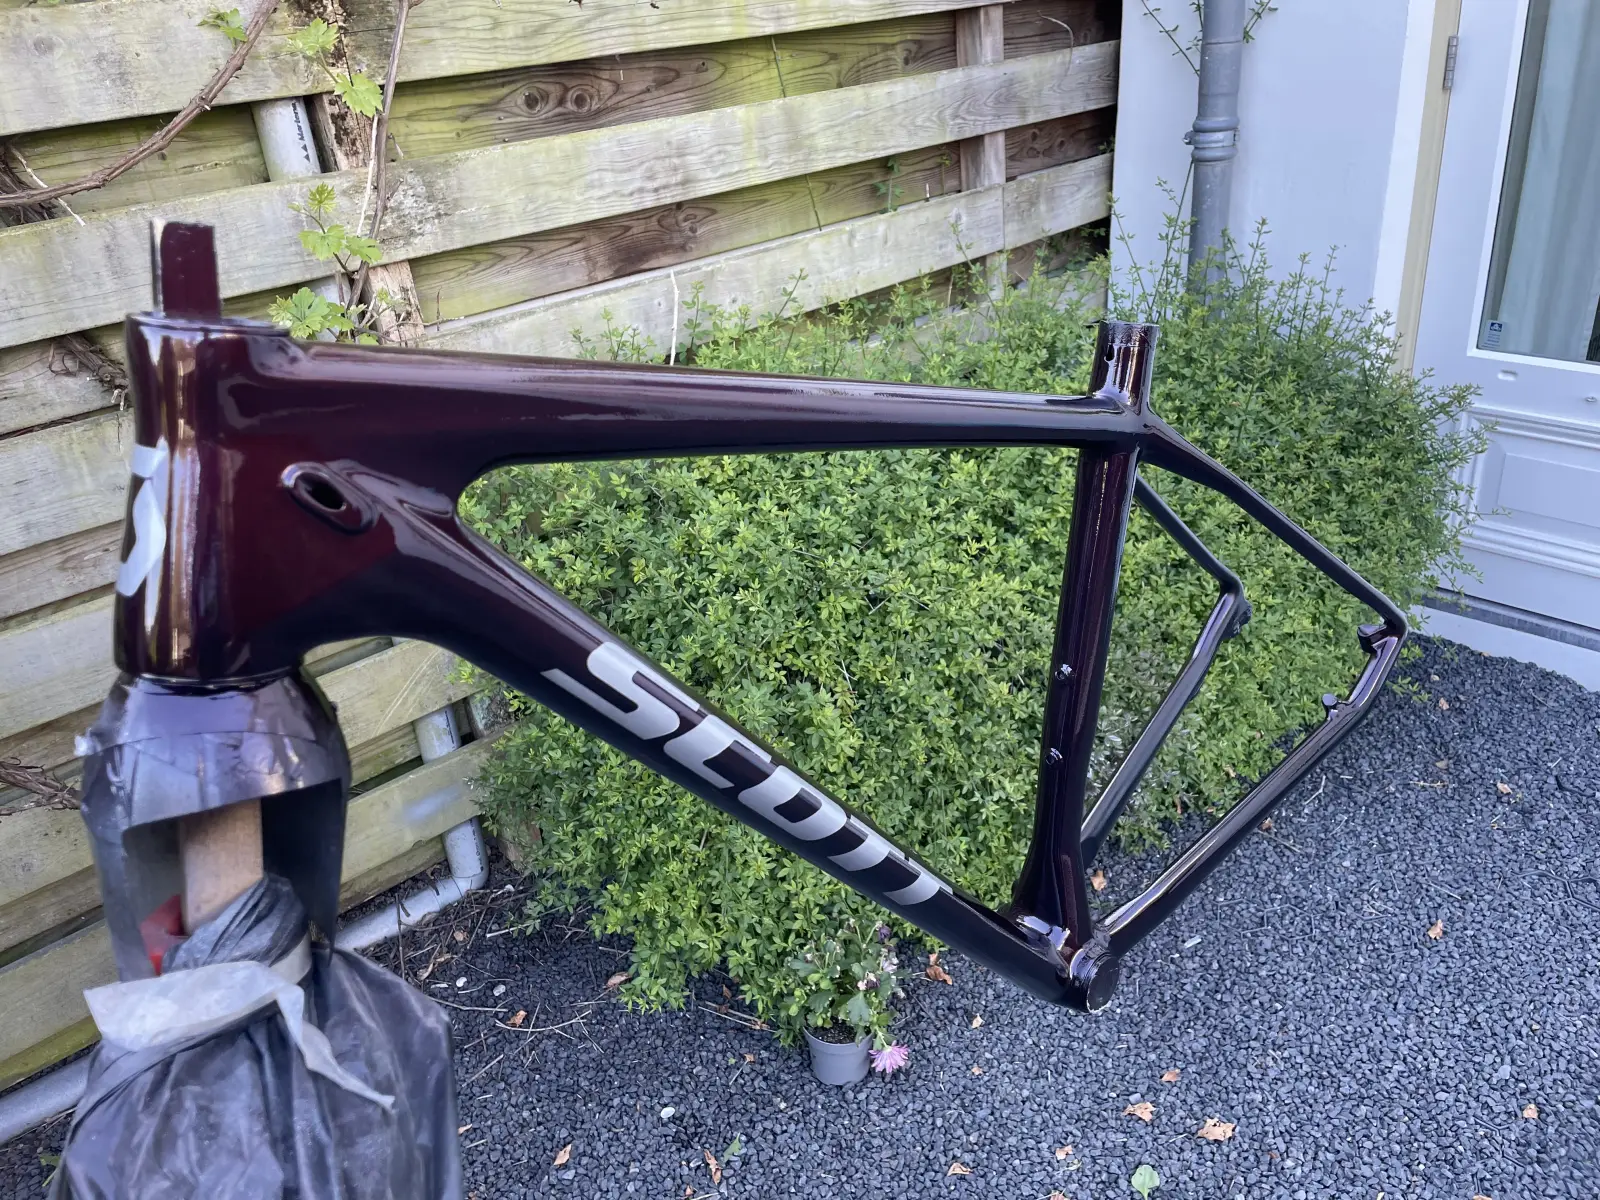
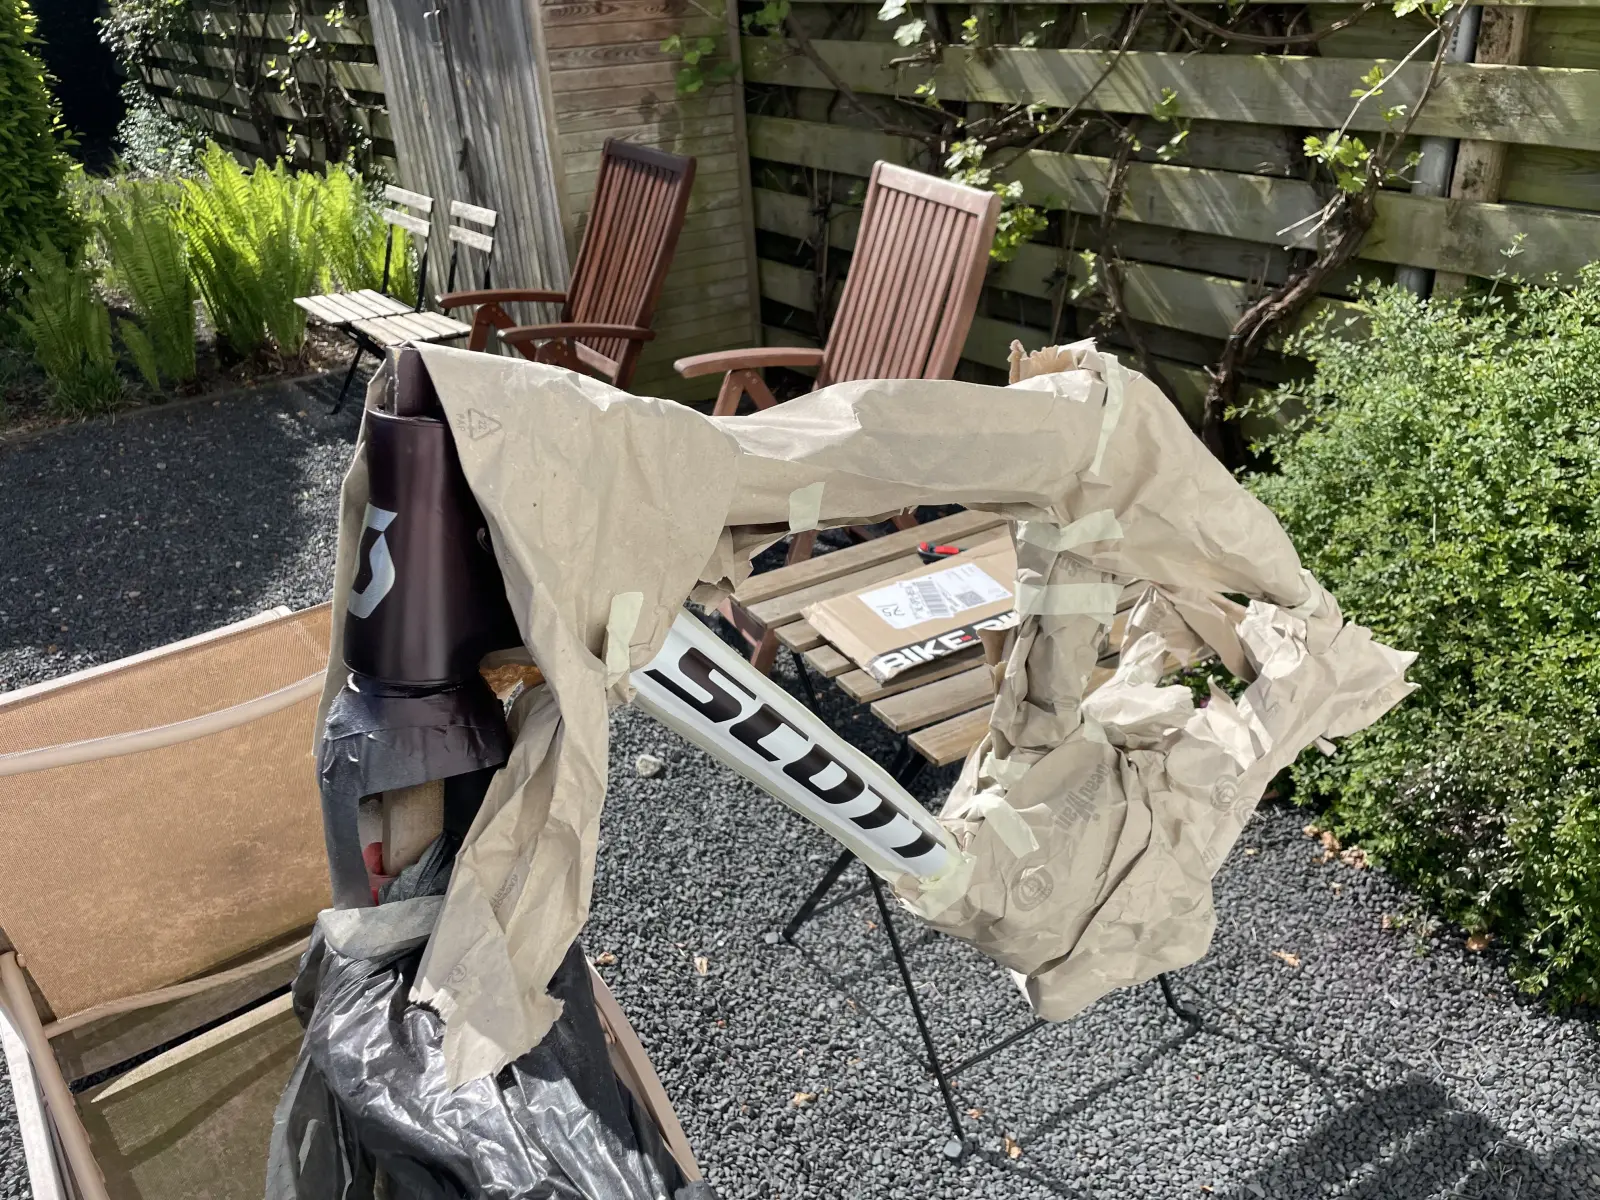
Decals down, before clear coat

Frame with all chrome decals done, no clear coat yet
All decals down, no clear coat yet
Frame with chrome decals, before clear coat, from the front
From the front

The chrome at this stage is dull and unprotected, fingerprint-vulnerable. The clear coat is what locks it in.

2K Spraymax clear coat

One layer of 2K. The decals go under the clear, not on top, so paint and chrome seal into a single surface, which is a big part of why a sprayed decal beats a stuck-on sticker for durability.

Frame after clear coat, front angle, chrome decals visible under the clear
After clear coat, front angle
Frame after clear coat, rear angle
Rear angle

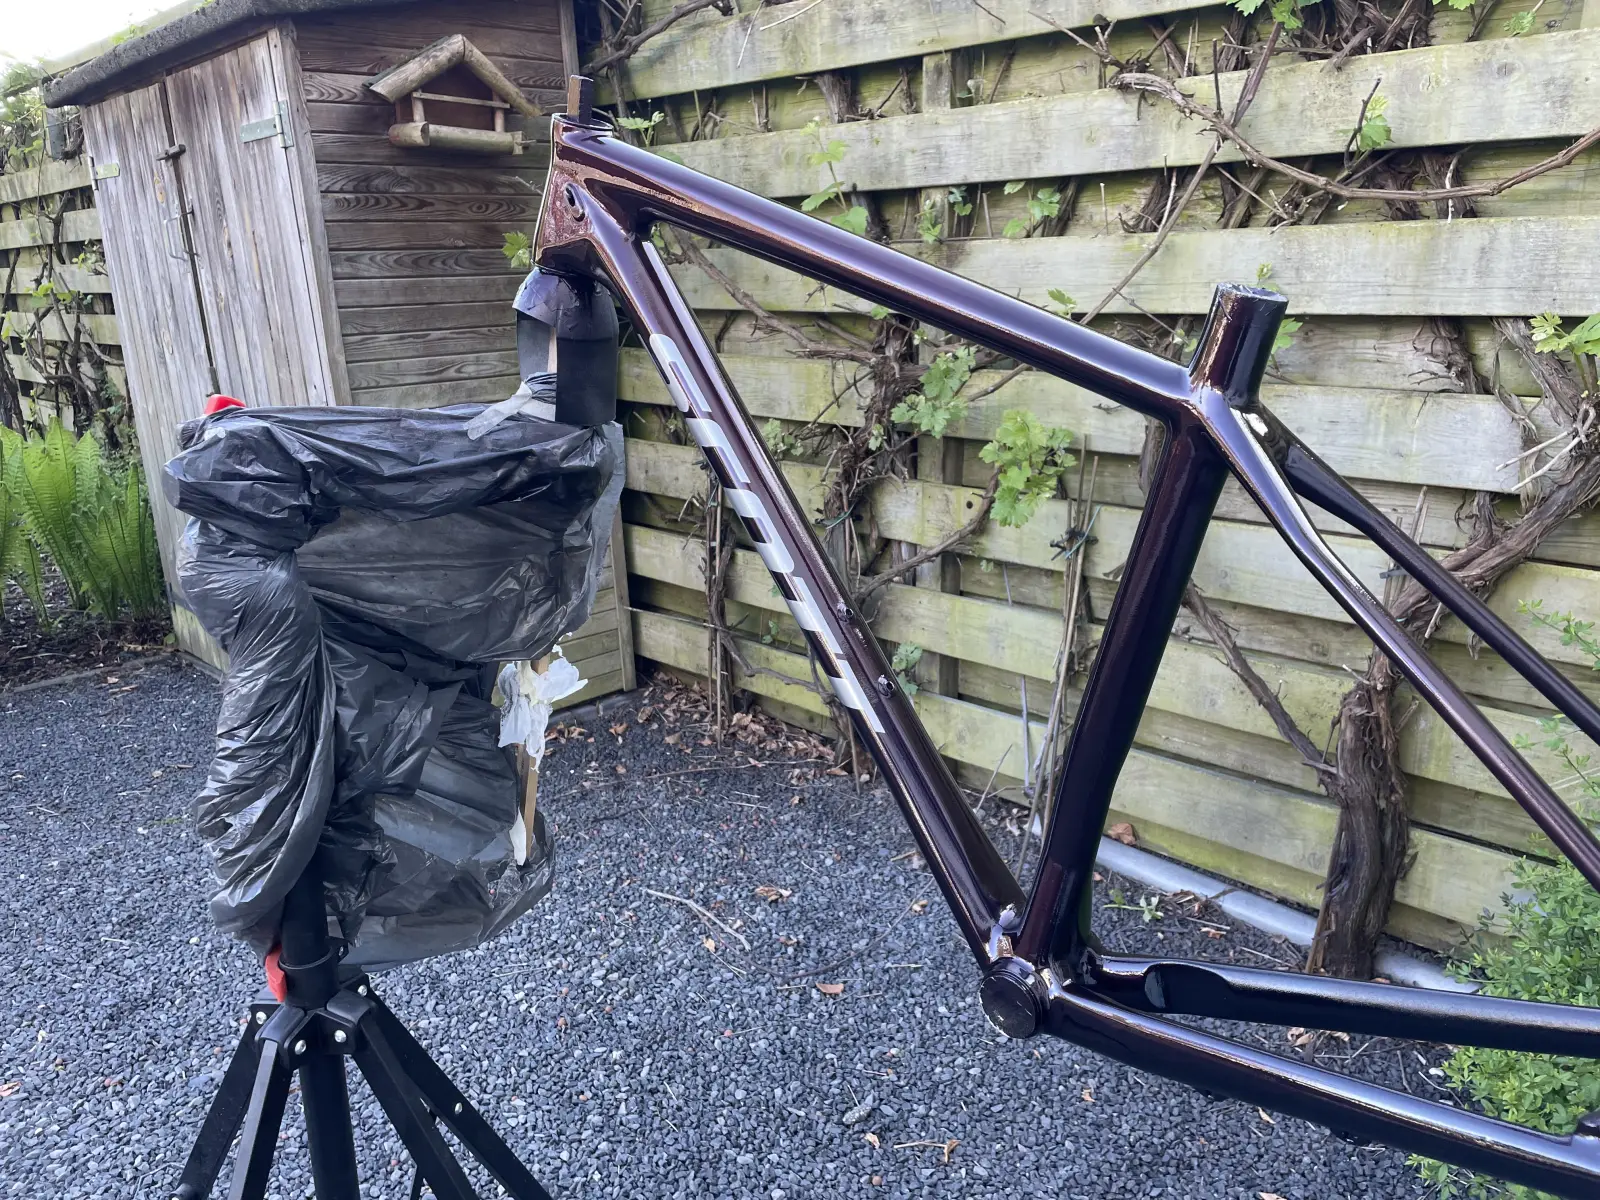
The clear gives the aubergine its depth. That off-axis shift from purple to almost-black only really shows up under a coat. Closeups:

Frame after clear coat, from above the head tube, showing the chrome S and depth of the paint
From the head tube
Clear-coated frame, side closeup near the head tube
Side view, head tube
Clear-coated frame, close-up of the bottom bracket area in Montana Black
BB, Montana Black under clear
Clear-coated frame, close-up at the seat-post junction
Seat-post junction
Clear-coated frame, drive-side near the bottom bracket
Drive-side, near BB
Clear-coated frame, drive side, with dropper post installed
Clearcoated frame from the drive side with the dropper post installed

Build it back up

Frame back together with fork, seatpost and handlebars in place
Fork and bars back on
Final built bike, complete
And done

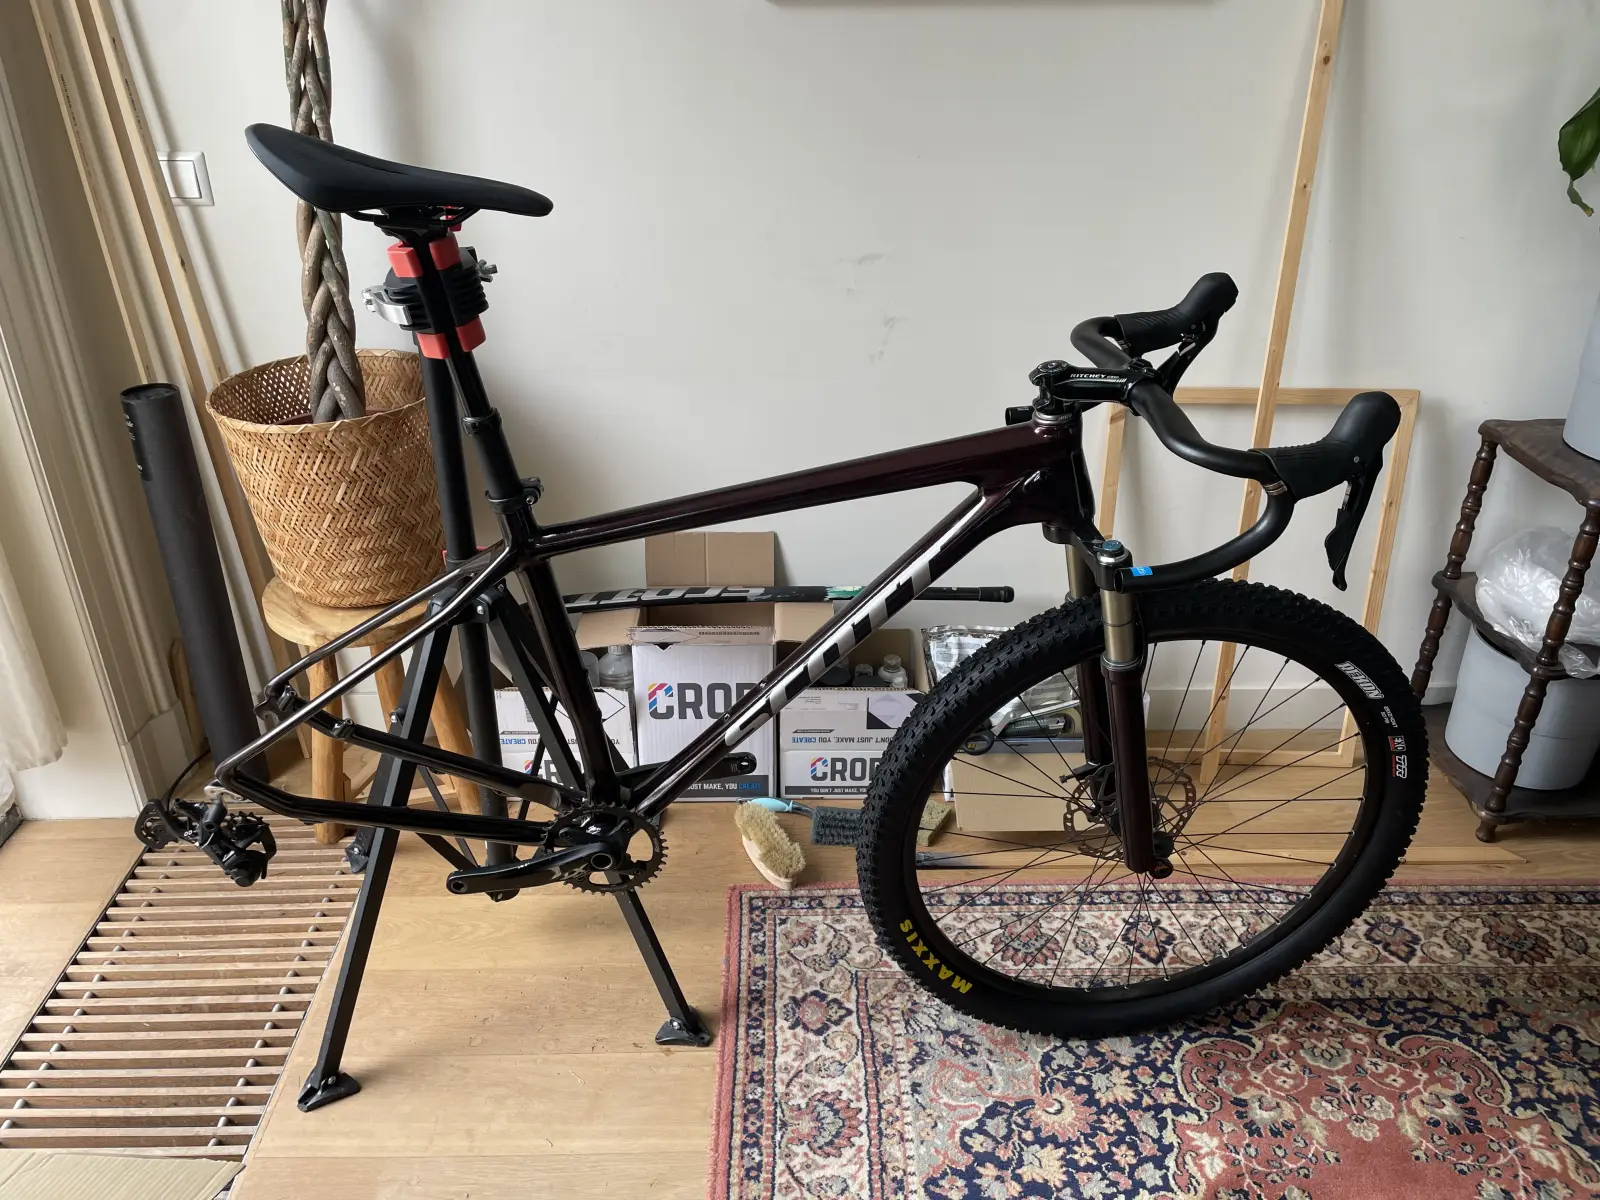
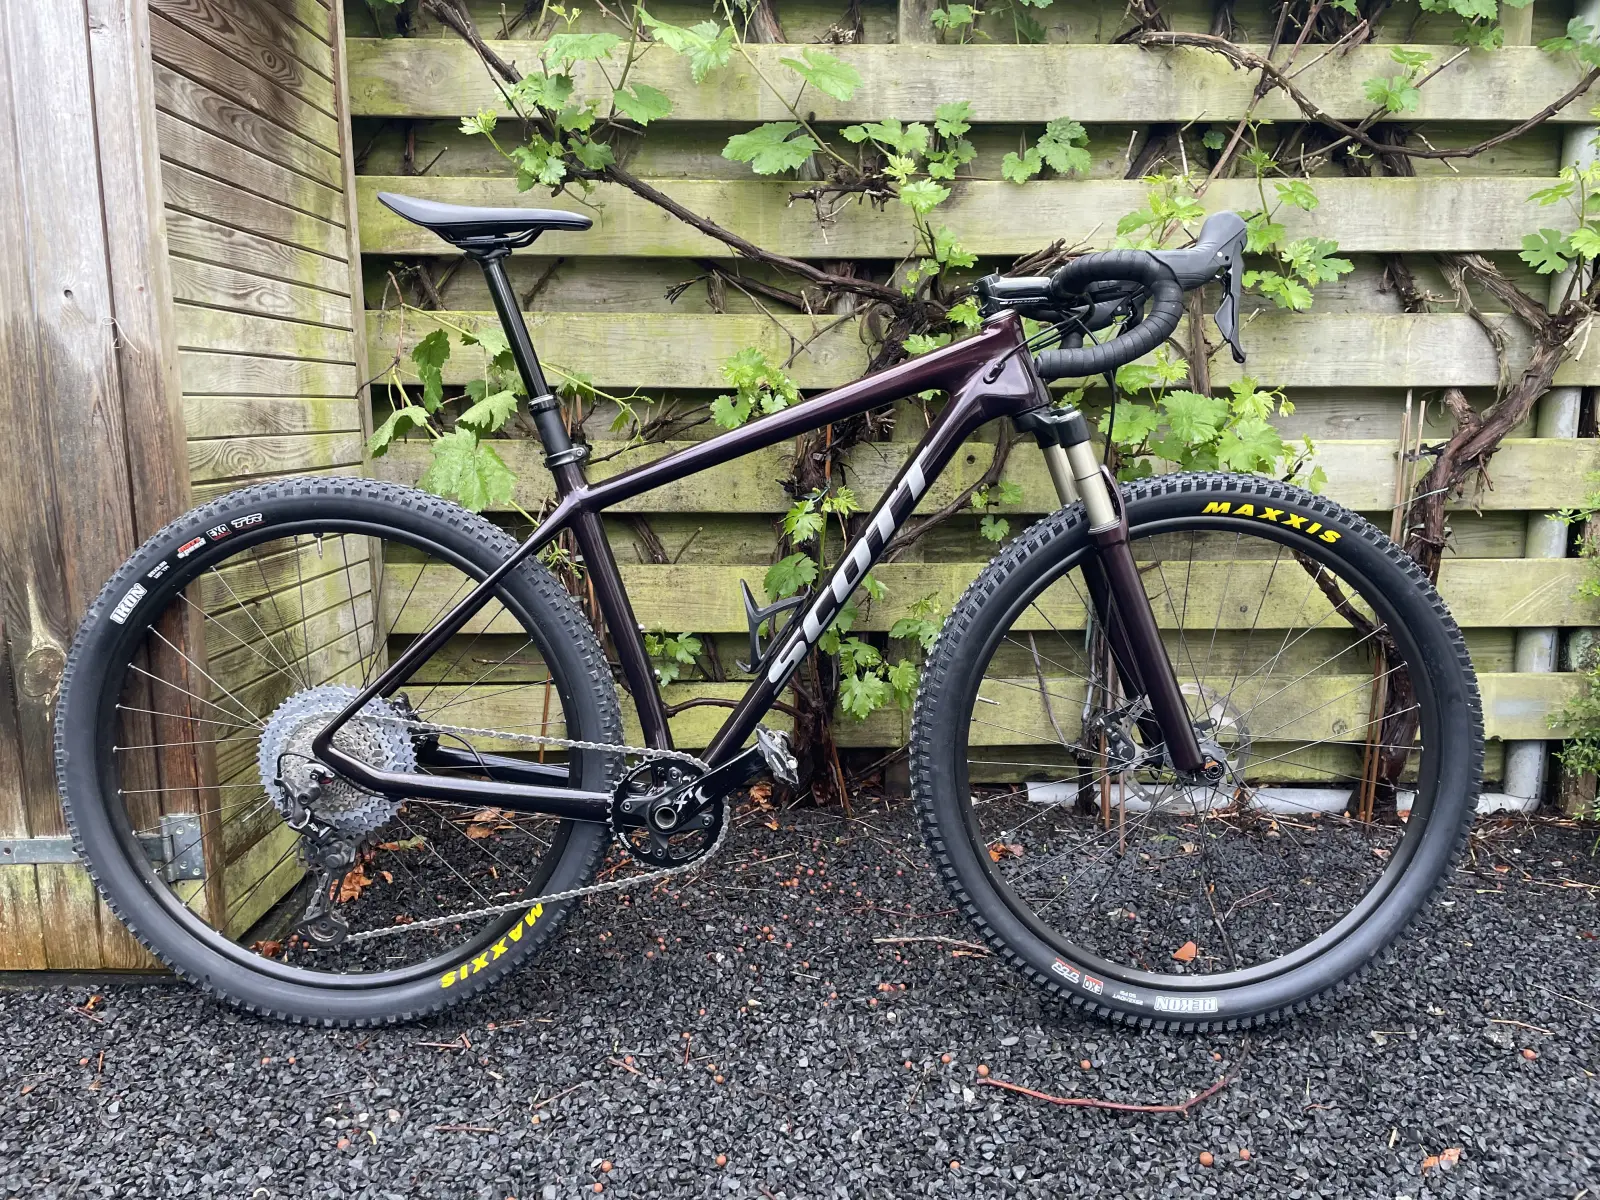
The full bike, drivetrain, cockpit, dropper, the whole drop-bar hardtail conversion, is the subject of this post.

Previous projects

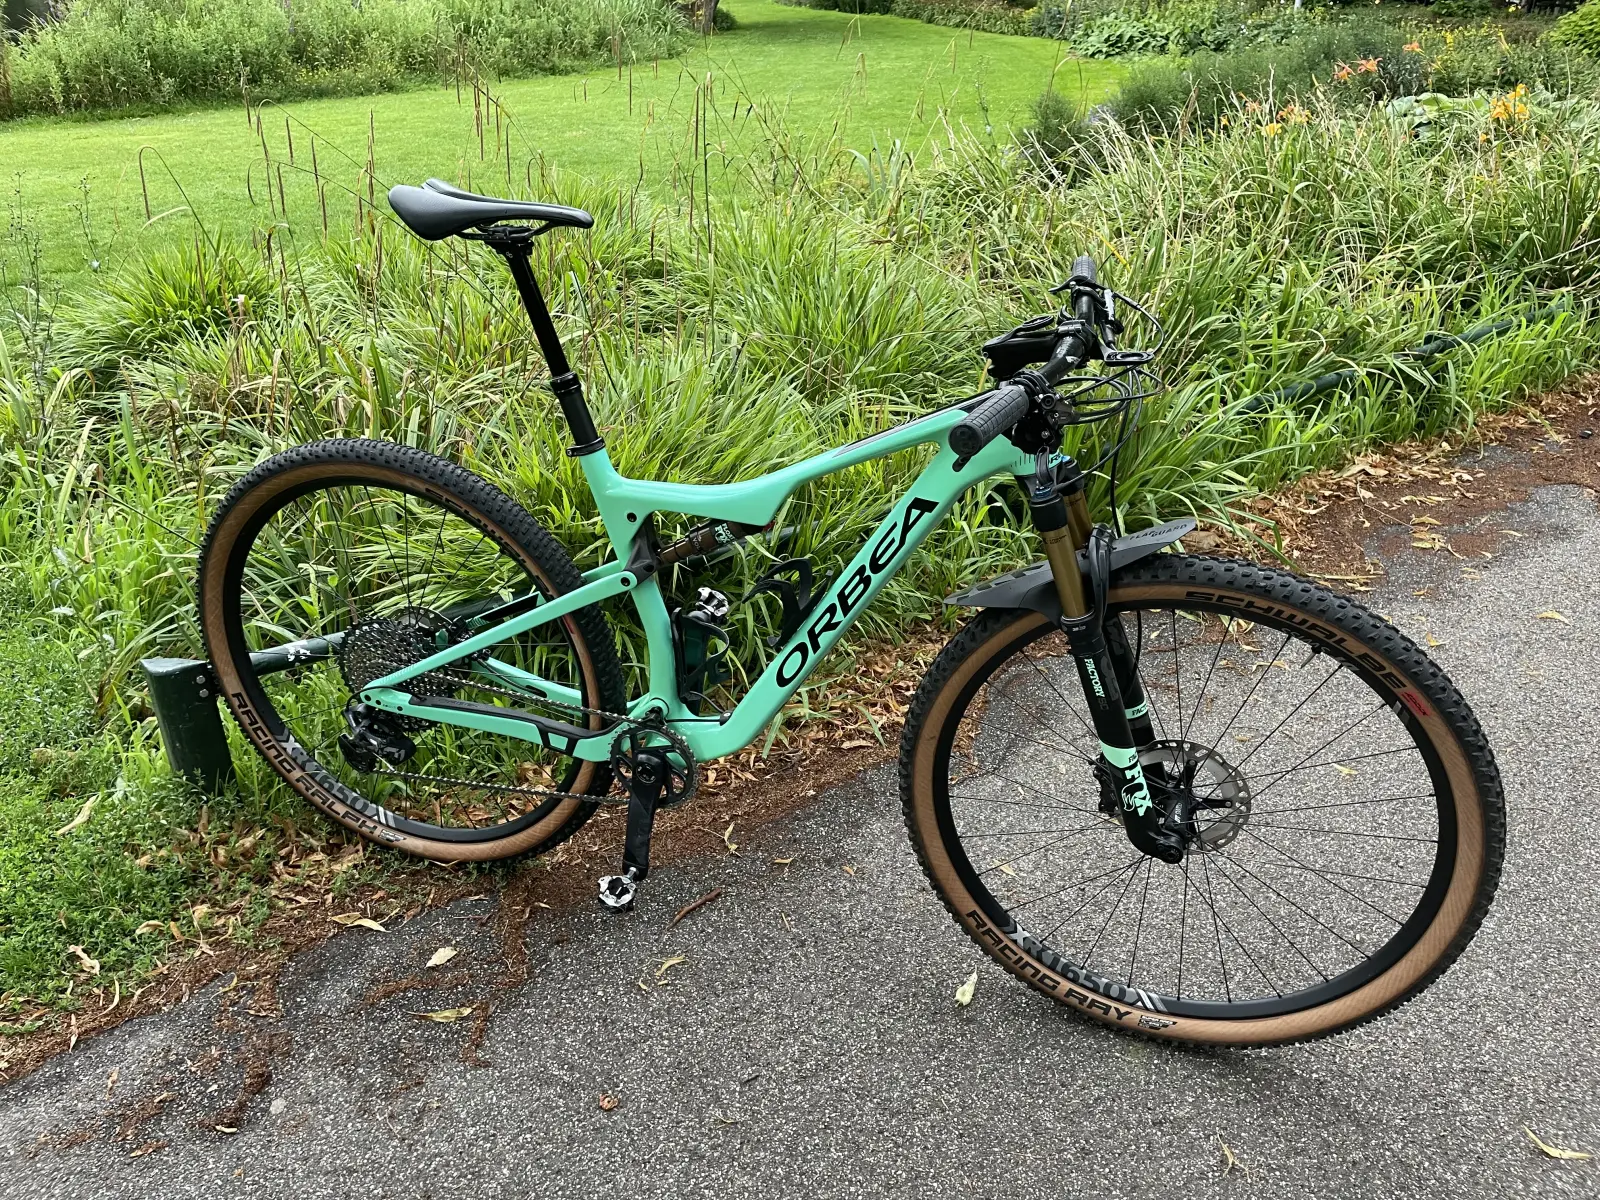
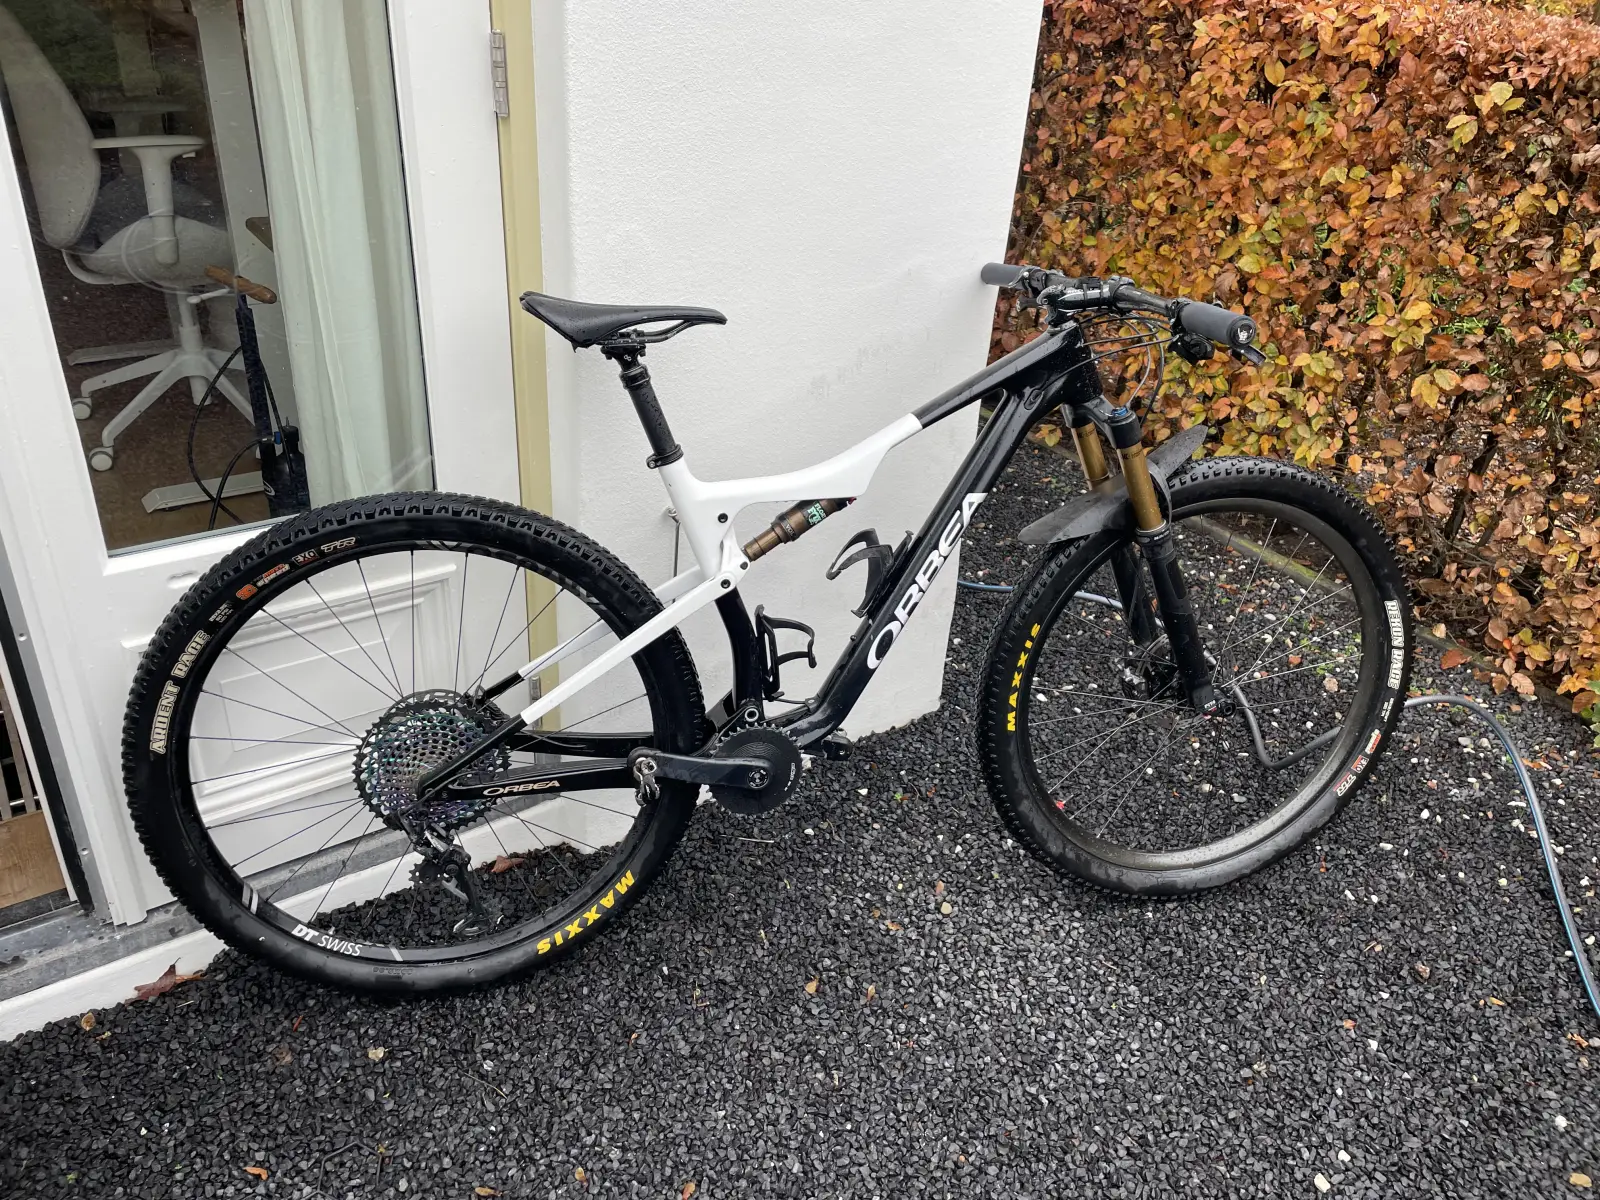
The Scott wasn't my first carbon respray. A year earlier I stripped a full-suspension Orbea down to bare frame and took it from factory celeste green to a black-and-white scheme. Same workflow — strip, prime, base coats, clear — and a useful rehearsal for this build.

Orbea full-suspension MTB in factory celeste green, full bike on a path beside grass
Factory celeste green, before
Celeste green Orbea frame and fork stripped down on a workshop stand
Stripped, on the stand
Orbea resprayed in black and white, full bike against a wall
Resprayed, black and white
POV riding the resprayed black-and-white Orbea down a forest flow trail
On the trails, after